Settings
A walkthrough of the "Settings" section — the restaurant profile (info, address, regional settings) and the panel interface settings.
The “Settings” section is the basic configuration of the restaurant and the panel interface. Two tabs: Restaurant and Interface — which ones you get depends on your role (see Roles & Permissions).
Restaurant
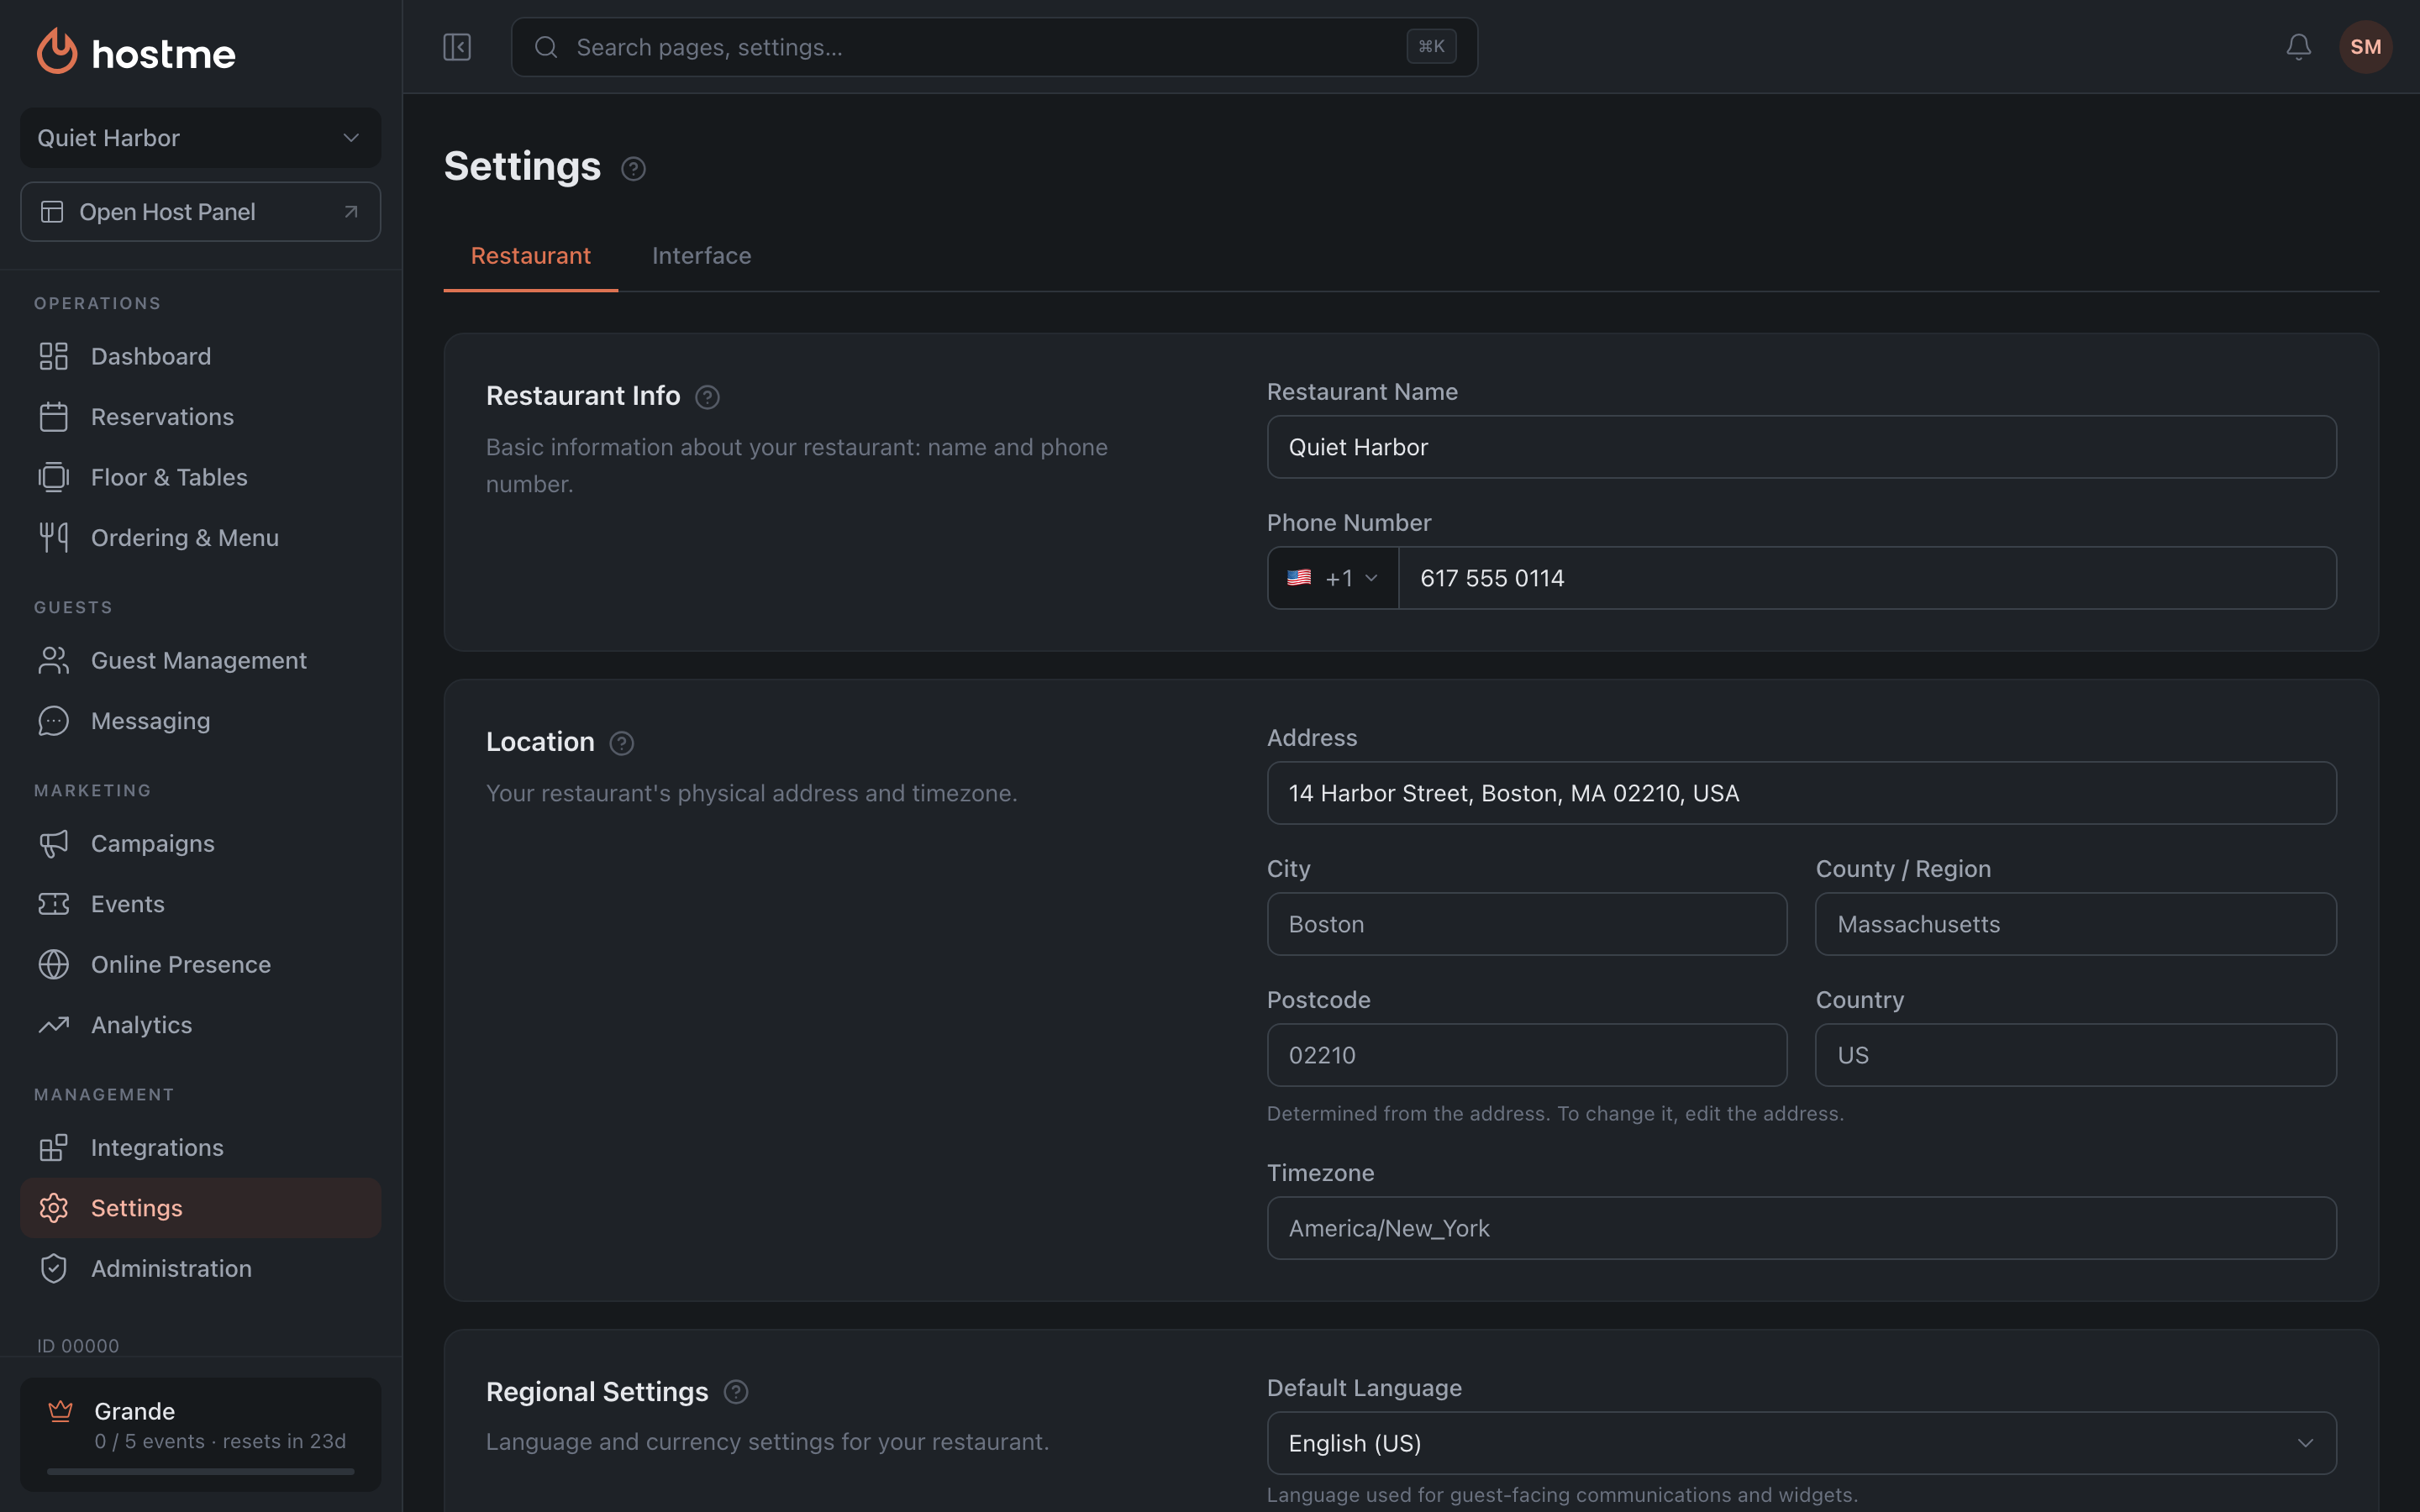
The restaurant profile — three blocks.
Restaurant Info
Restaurant Name and Phone Number. The phone goes with its country code: pick the country with the flag to the left of the number. These are not housekeeping fields: the name goes into emails and SMS to guests and shows in the widget, and the phone number is what a guest sees on a confirmation. Change the name here and it changes everywhere, including email templates already in use.
The restaurant’s website isn’t set here: you add it on the public page.
Location
You enter the Address yourself. City, State / Province, ZIP / Postal Code, Country and Timezone are filled in from the address and can’t be edited by hand. To change them, correct the address.
The timezone is the most consequential field on the tab: every time in the panel is computed from it, from the shift schedule to when reminders go out. If it’s wrong, reservations arrive shifted and reminders are sent in the middle of the night. In that case, check the address: it most likely has a mistake.
Regional Settings
Default Language and Currency. The language is the one chosen when the restaurant was created; the currency follows the country in the address. Both can be changed by hand.
The language here is the restaurant’s language, not the panel’s: it is the language of emails and SMS to guests, booking confirmations and reminders. The interface language is personal to each member of staff and is set in the profile — you can read the panel in English while guests are written to in Spanish.
The currency sets what deposits, fees, orders and financial reports are counted in.
Interface
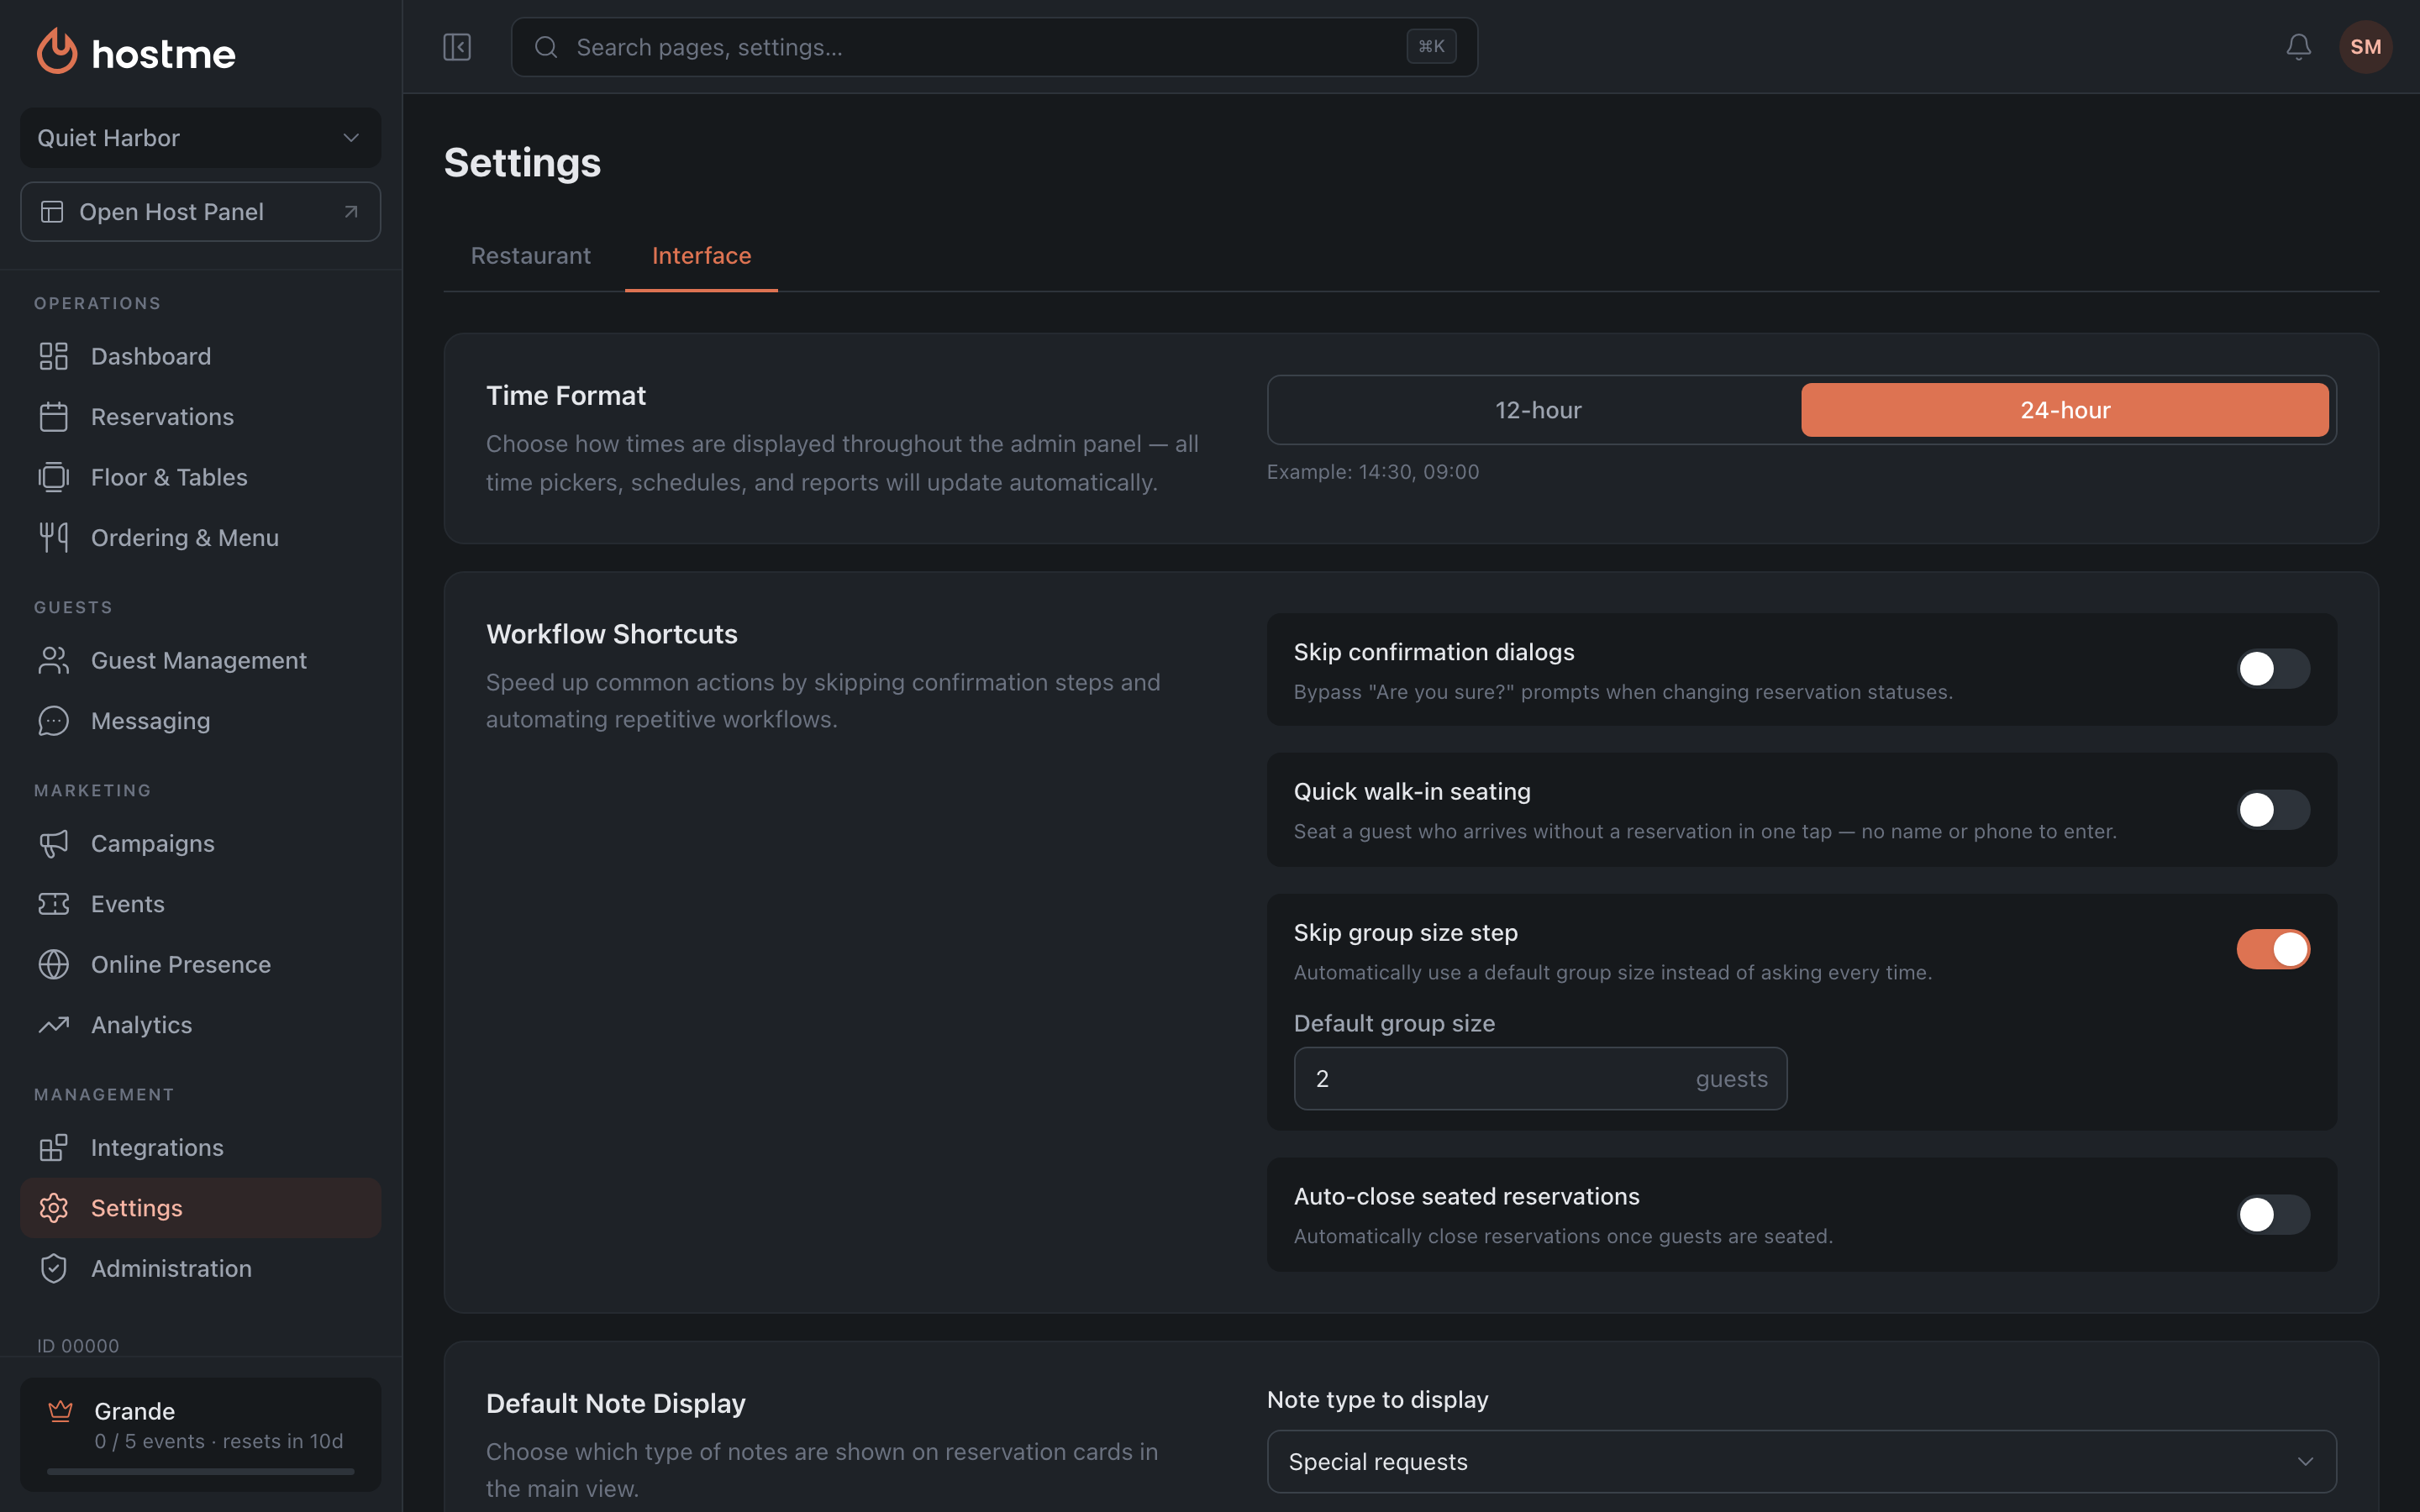
How the panel behaves. Each setting is a separate card on the tab.
Time Format
12- or 24-hour. It applies across the whole panel at once: time pickers, the schedule, reservation cards and the timeline.
Workflow Shortcuts
Four switches that take steps out of the shift:
- Skip confirmation dialogs — no “Are you sure?” when a reservation’s status changes.
- Quick walk-in seating — seat a guest who walks in with one click, without entering a name and phone.
- Skip group size step — use the default party size; turning it on reveals a “Default group size” field (1 to 100).
- Close the reservation as soon as guests are seated — the reservation closes the moment you press “Seat”: the table doesn’t stay occupied in the Host Panel and the visit counts for the guest right away. It suits you if you don’t track the table after seating and “Seat” just means “the guest has arrived”. If you track the table until the guests leave (statuses, “Release table”), leave it off — otherwise the reservation is “Closed” right after seating.
Default Note Display
Which type of note to show on reservation cards: special requests, internal notes or guest notes. You pick one — the one your team actually reads during the shift.
Module Visibility
Hides the panels you don’t use so the side menu doesn’t get in the way: “Tables”, “Waitlist”, “Reservations”, “Timeline”, “Server Management”, “Guestbook”. Hiding doesn’t disable the feature — it only removes the item from the menu.
Getting Started checklist
Whether to show the onboarding banner and dialog on the dashboard. Once the restaurant is set up, the checklist is usually turned off so it doesn’t take up space.
Support
Disables in-app chat support — for restaurants that handle requests through their own desk.
Host Panel version
Only restaurants that moved over from the old Admin and the old app have this section. A restaurant created in the new Admin runs on the new Host Panel from day one — it doesn’t have this section.
Up to two settings here:
- Restaurant version — the default version for all staff and all devices. Only those who can edit the restaurant change it; other roles won’t have the setting at all.
- This device only — try another version for yourself without switching everyone else. When the override is on, it is marked right in the section, and you can go back with “Follow restaurant version”.
Classic admin
The option to look into the previous version of the Admin. The “Open the classic admin” button opens it in a new window, while the new Admin stays open in its own. Under the button there is a direct link to the classic Admin: it works like the button, just without the confirmation. Old bookmarks and a typed-in address lead to the new Admin — get to the classic one from here.
It affects only the current device and lasts until you open the new Admin again: while you work in the classic one, links from the Host Panel on this device lead there too. As soon as you open the new Admin again — reload its tab or launch the app — everything leads back to the new one. Your colleagues and your other devices stay in the new Admin the whole time; nothing changes for the restaurant.
How changes are saved
Both tabs — with the “Save Changes” button at the bottom (it appears when there are edits); the modified tab shows a dot.
The exceptions are the “Host Panel version” and “Classic admin” sections: the choice applies immediately, bypassing the save button. Changing the restaurant version and the “Open the classic admin” button additionally ask for confirmation in a dialog; the “This device only” switch and the direct link act without asking.