Floor Builder
The full-screen layout editor: tools, table properties, decor, editing several objects at once, shortcuts and working from a phone.
The builder is the full-screen editor for a floor plan. In it you place tables the way they actually stand in the room, add walls, areas and decor — and the panel then uses that layout for seating, for the floor map in the Host Panel and for automatic table assignment.
It opens when you click a plan in Floor Plans.
How the screen is laid out
The toolbar is on the left, the canvas in the middle, and the properties of the selected object on the right. At the top: the plan’s name, the button back to the list, and Save, plus who changed the plan last and when — for example, “Last edited by Anna 3 days ago”.
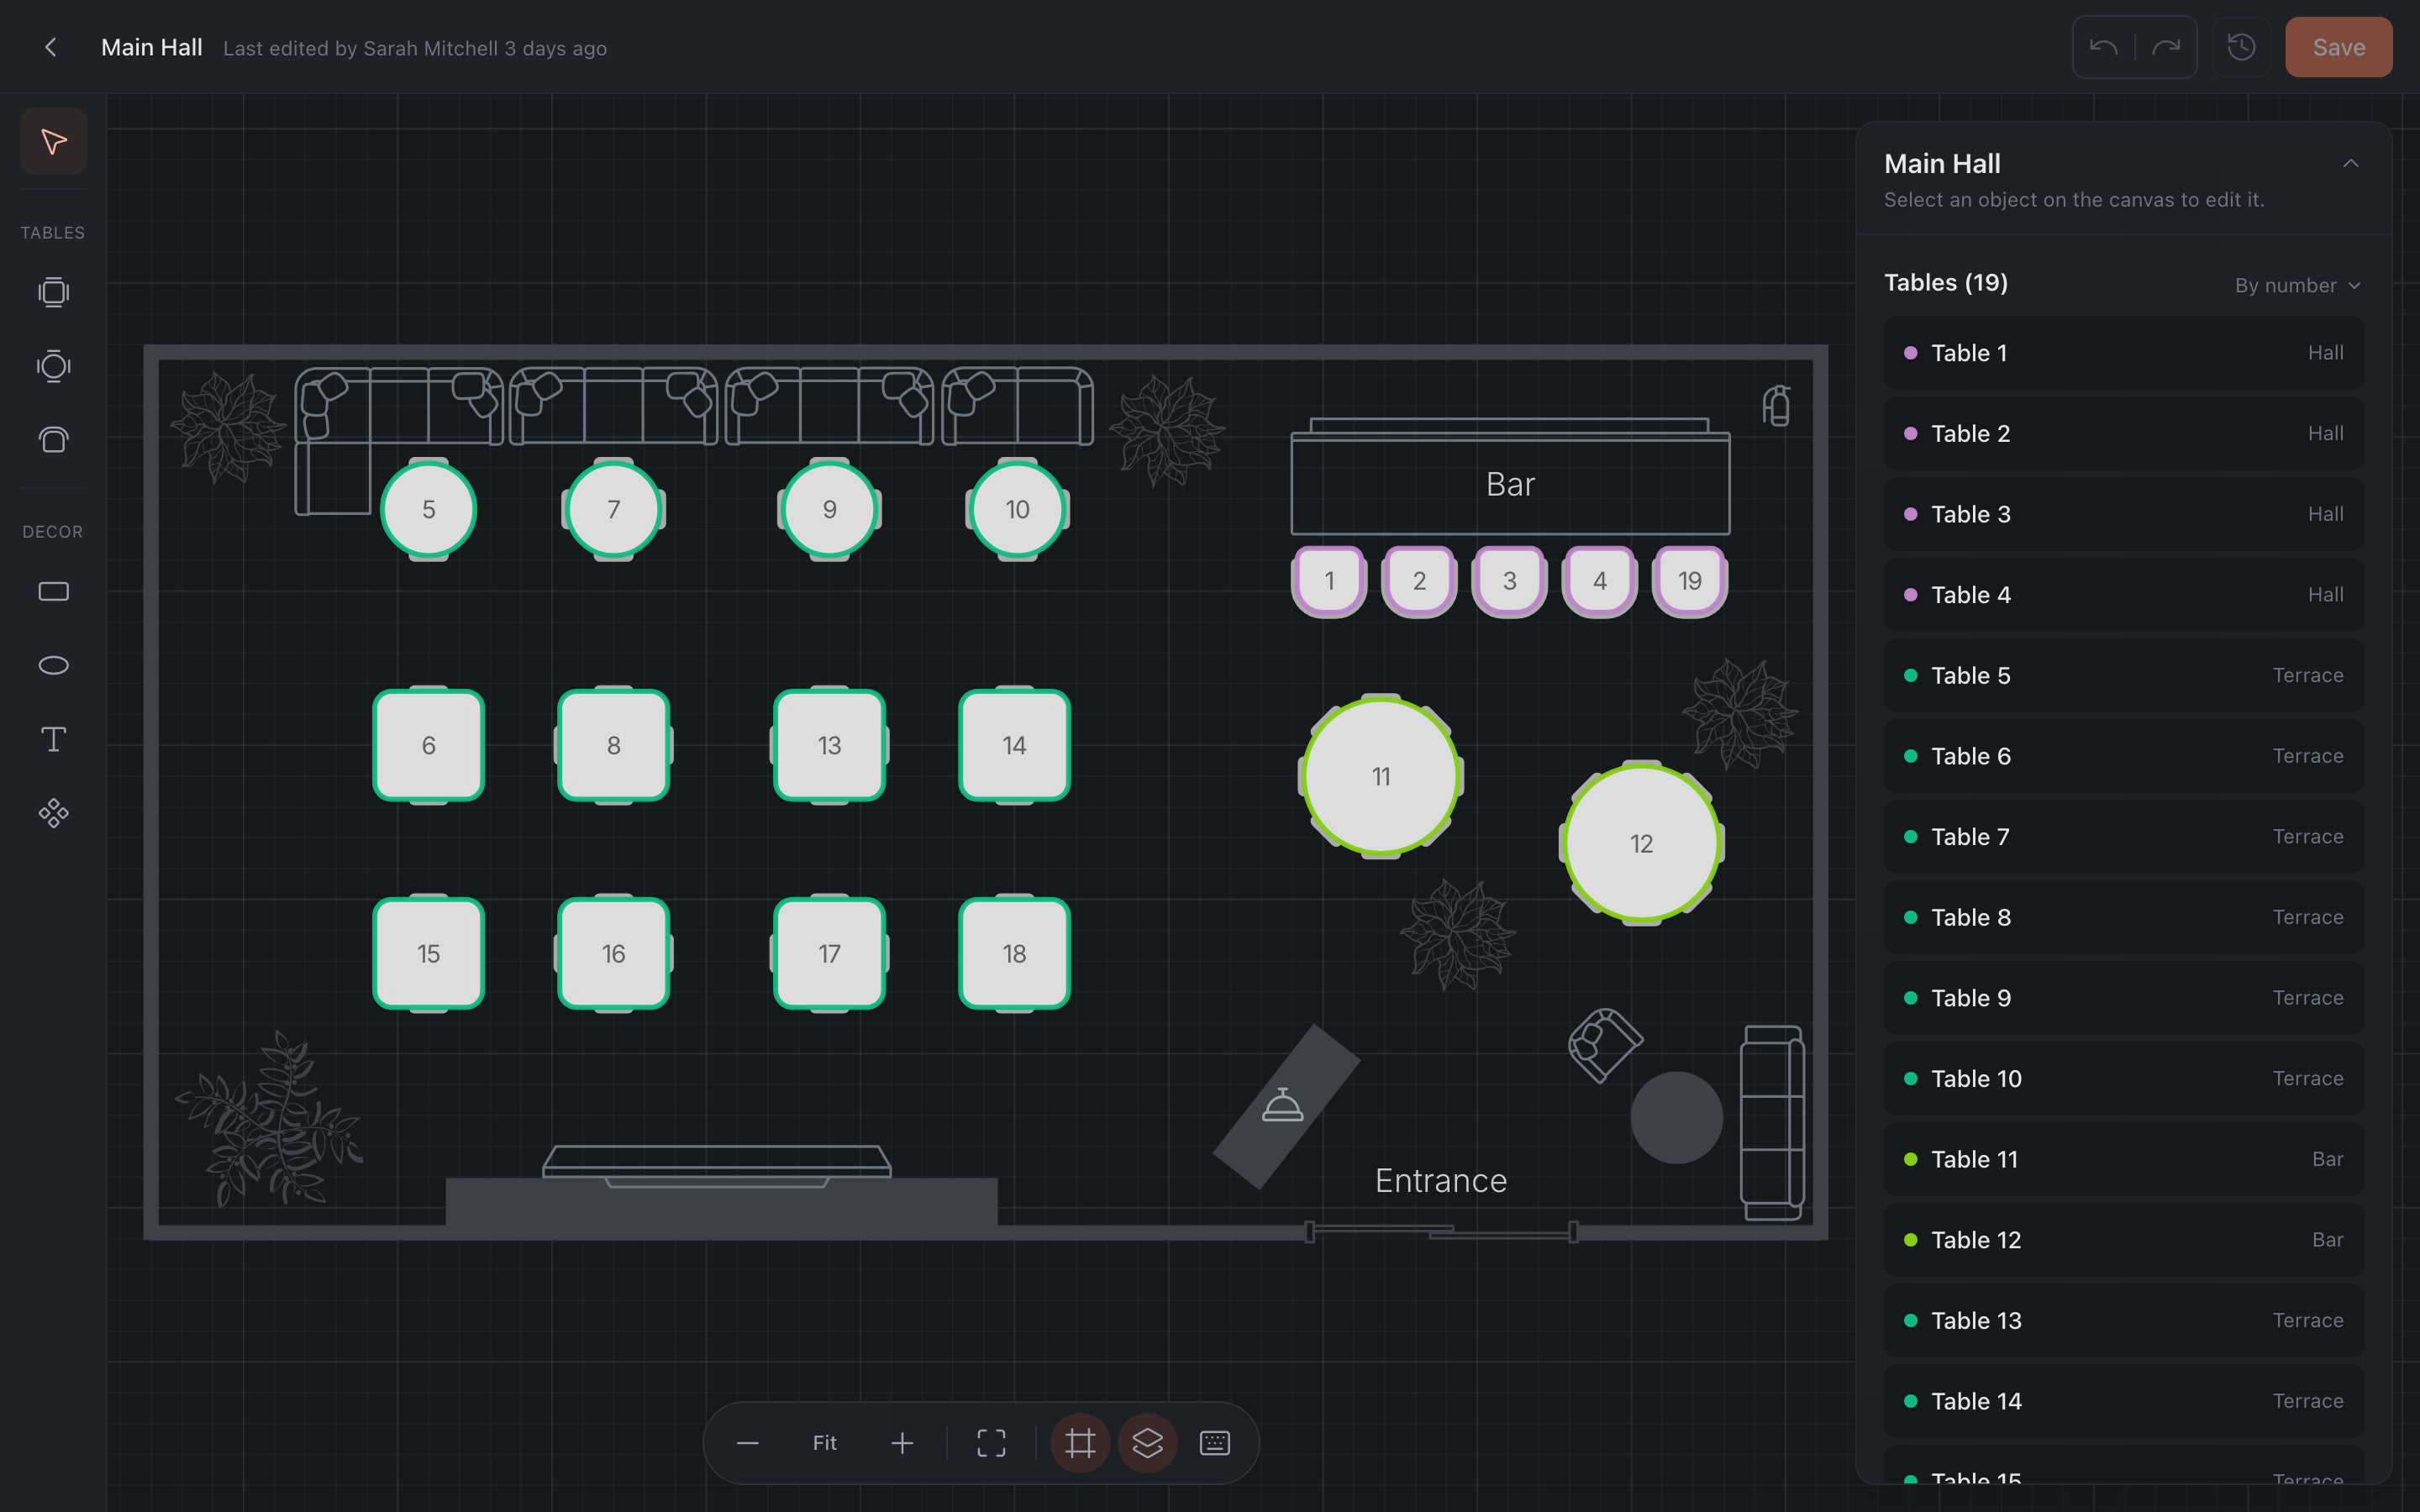
Changes are not saved by themselves. While there are unsaved edits, their number is shown at the top — “3 unsaved changes” — and after saving it turns into “Saved” with a time. The “Undo all unsaved changes” button returns the plan to its last saved state and clears the undo history.
Tools

| Tool | What it does |
|---|---|
| Select | the normal mode: select, move, resize |
| Rectangular table | a table with width and height |
| Round table | a table with a diameter |
| Bar / single-seat | a seat at the counter: fixed size, no capacity fields |
| Wall | a straight partition |
| Column | a round support |
| Text | a label right on the layout — “Entrance”, “Bar”, “Terrace” |
Tables only become available once at least one area exists: every table must belong to one. Until there are areas, the table buttons are disabled with a hint.
Undo and redo — buttons on the toolbar, or ⌘Z and ⌘⇧Z.
Decor
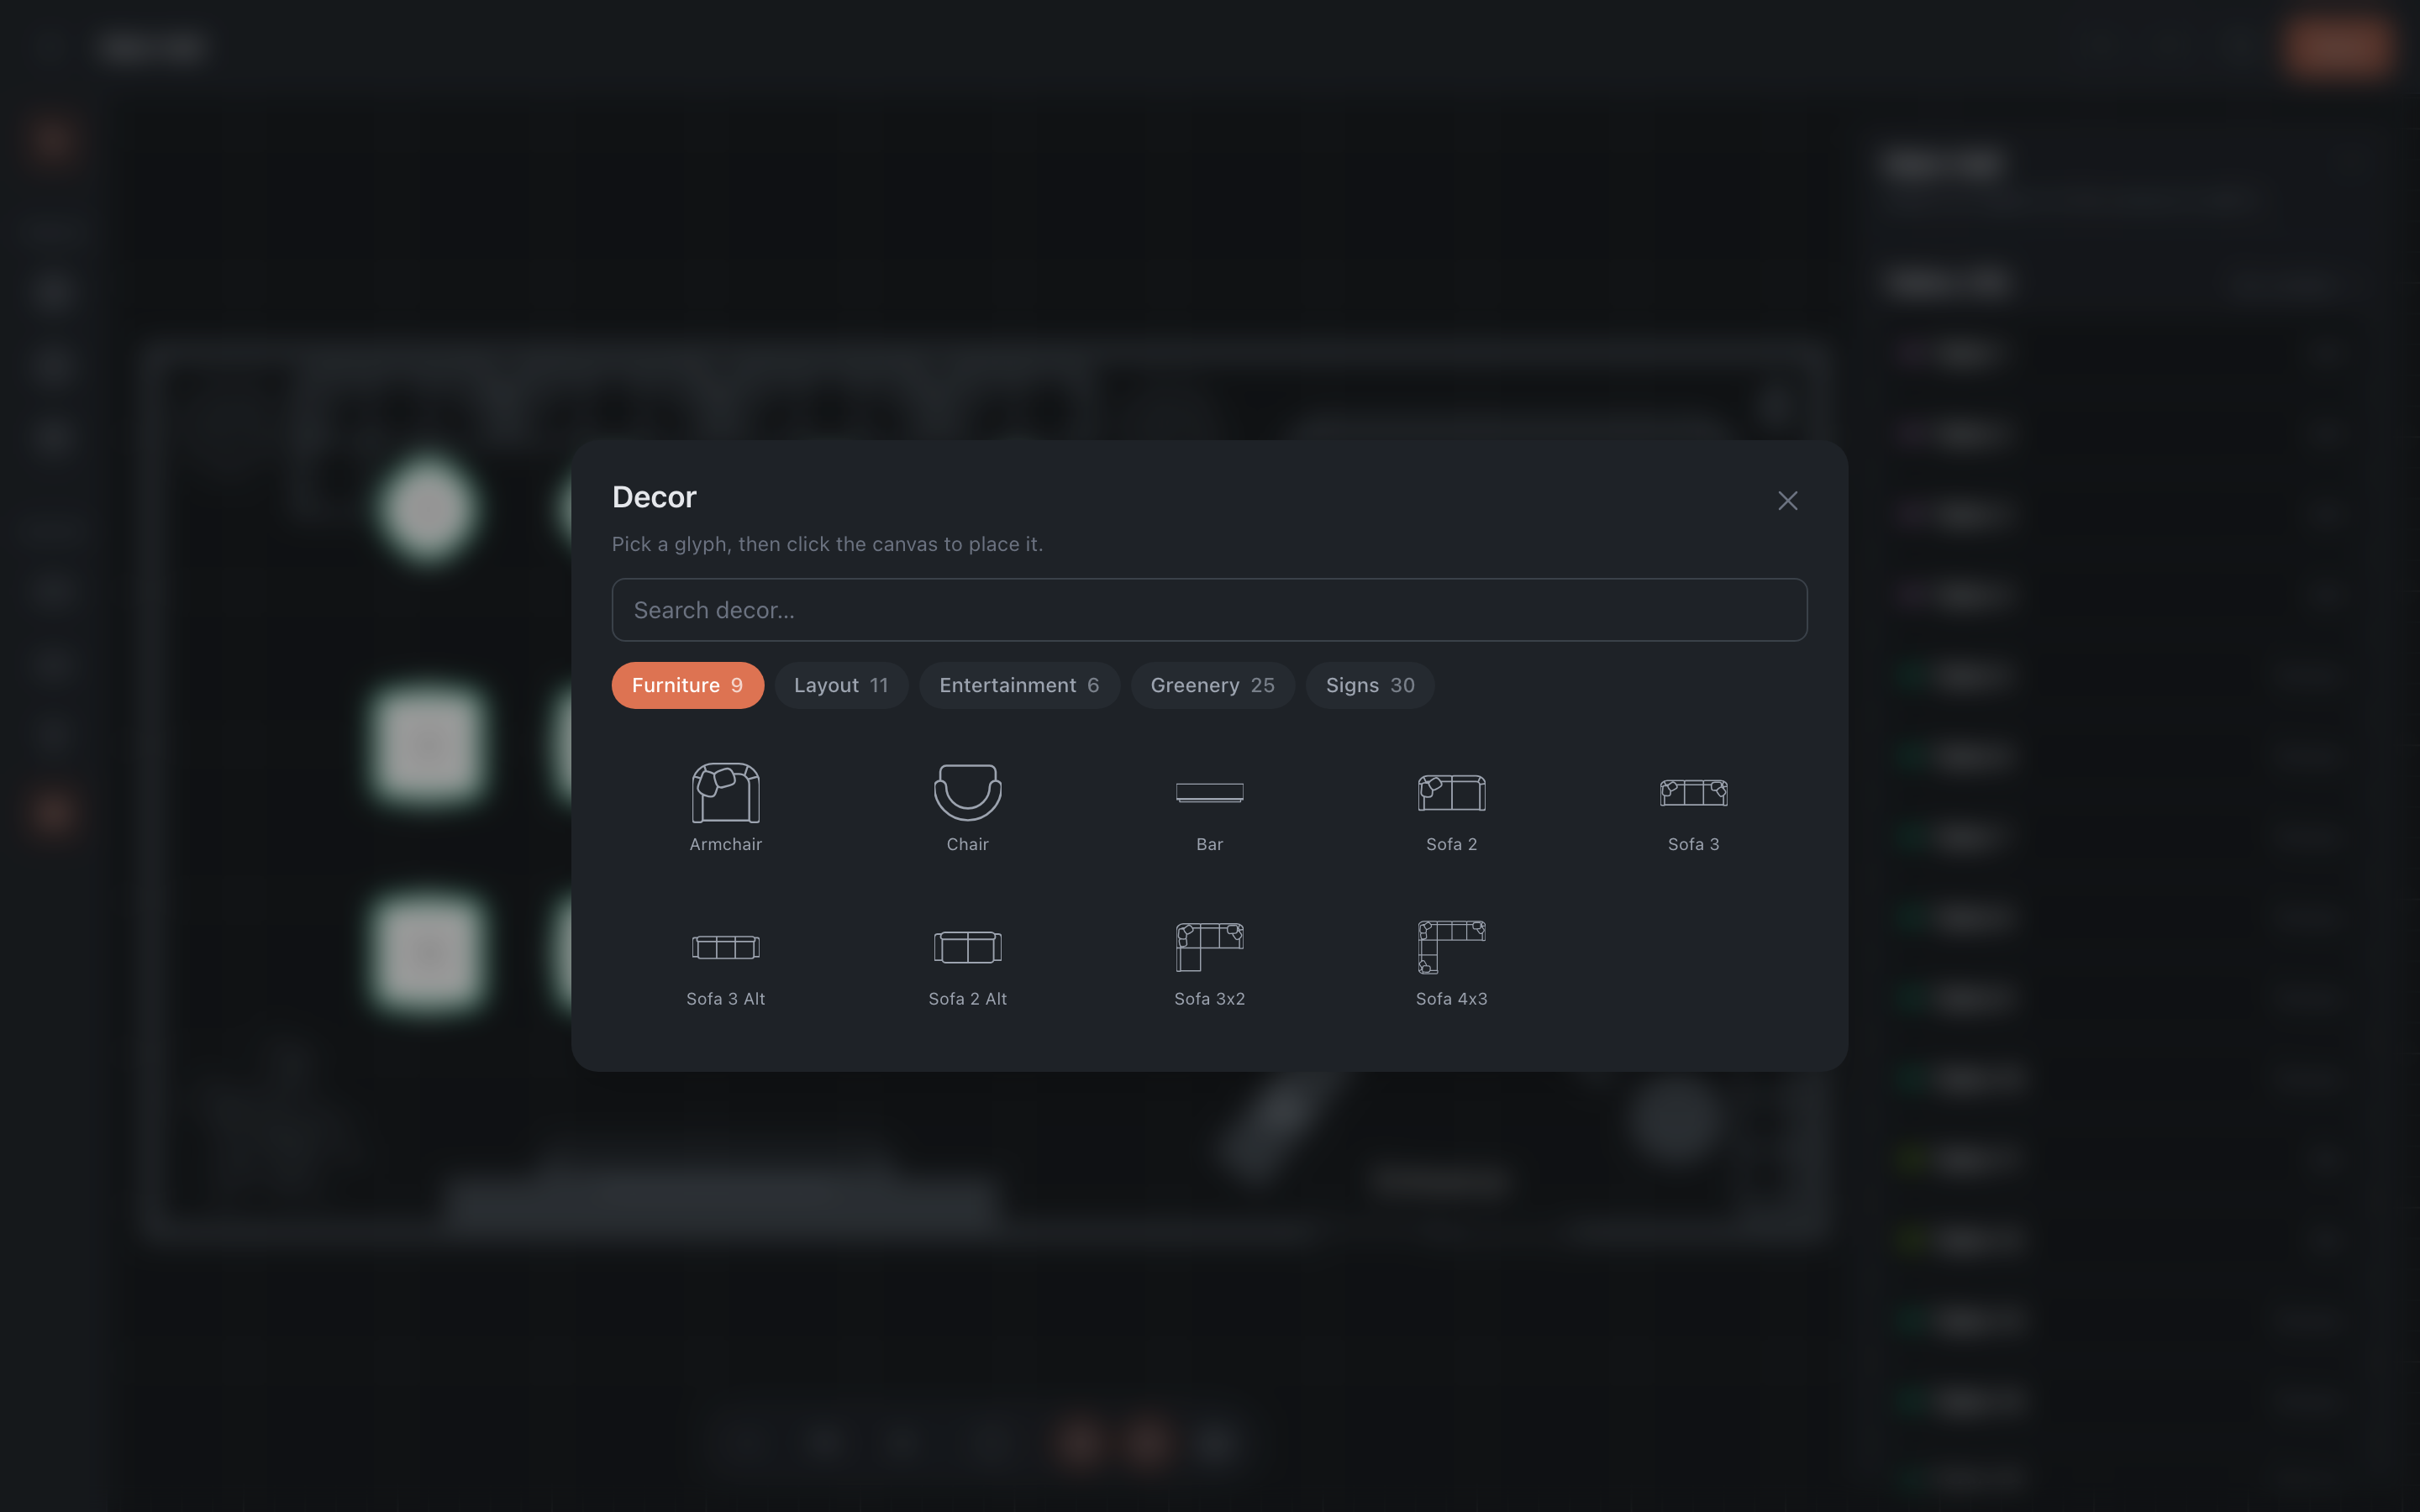
A separate library of 81 objects in five categories: furniture (9), layout (11), entertainment (6), greenery (25), signs (30). There is a search box. It has a sofa and a cloakroom, an entrance and an exit, a fire extinguisher and a camera, a DJ booth and a kids’ area, an accessibility sign.
Decor takes no part in seating — it is there so the host recognises the room at a glance and doesn’t confuse the window tables with the ones by the bar. Each object has a size and a fill colour.
Table properties
Select a table on the layout and its properties appear on the right.
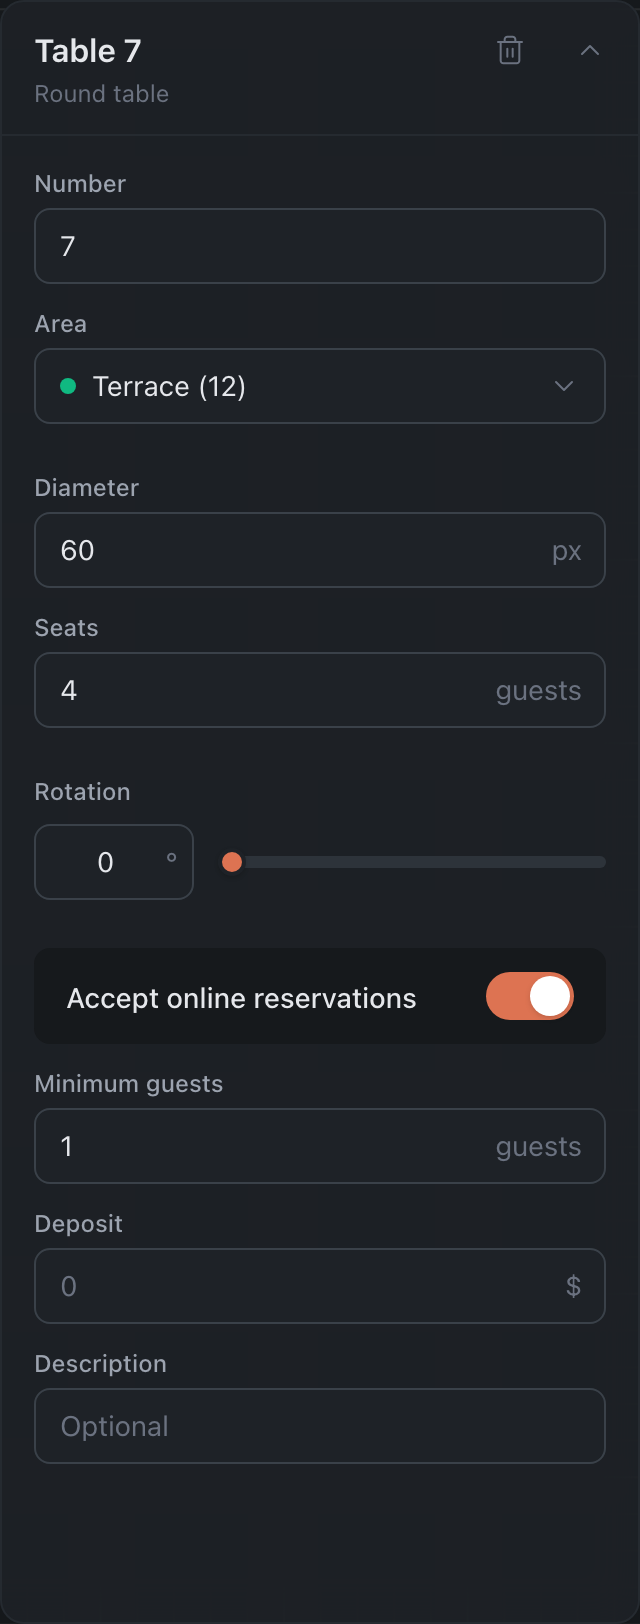
- Number — the table number. It must be unique not just on this floor but across all enabled plans: if an active plan already uses it, the layout won’t save. In a disabled plan a number can be reused — a hint then shows where else it appears.
- Area — which area the table belongs to.
- Width / Height (or Diameter for a round one) — the size. A bar / single-seat table has a fixed size: it has no size, “Seats” or “Minimum guests” fields.
- Seats — the table’s capacity. Change it and the chairs are redrawn around the table.
- Rotation — the angle.
- Accept online reservations — whether the table is available for online reservations. These are the tables counted as “N online” in the list of plans and areas.
- Minimum guests — the smallest party size for the table.
- Deposit — an optional deposit for this particular table.
- Description — a note about the table.
The Minimum guests, Deposit and Description fields depend on the Accept online reservations switch: while it is off, they are dimmed and unavailable.
Several objects at once
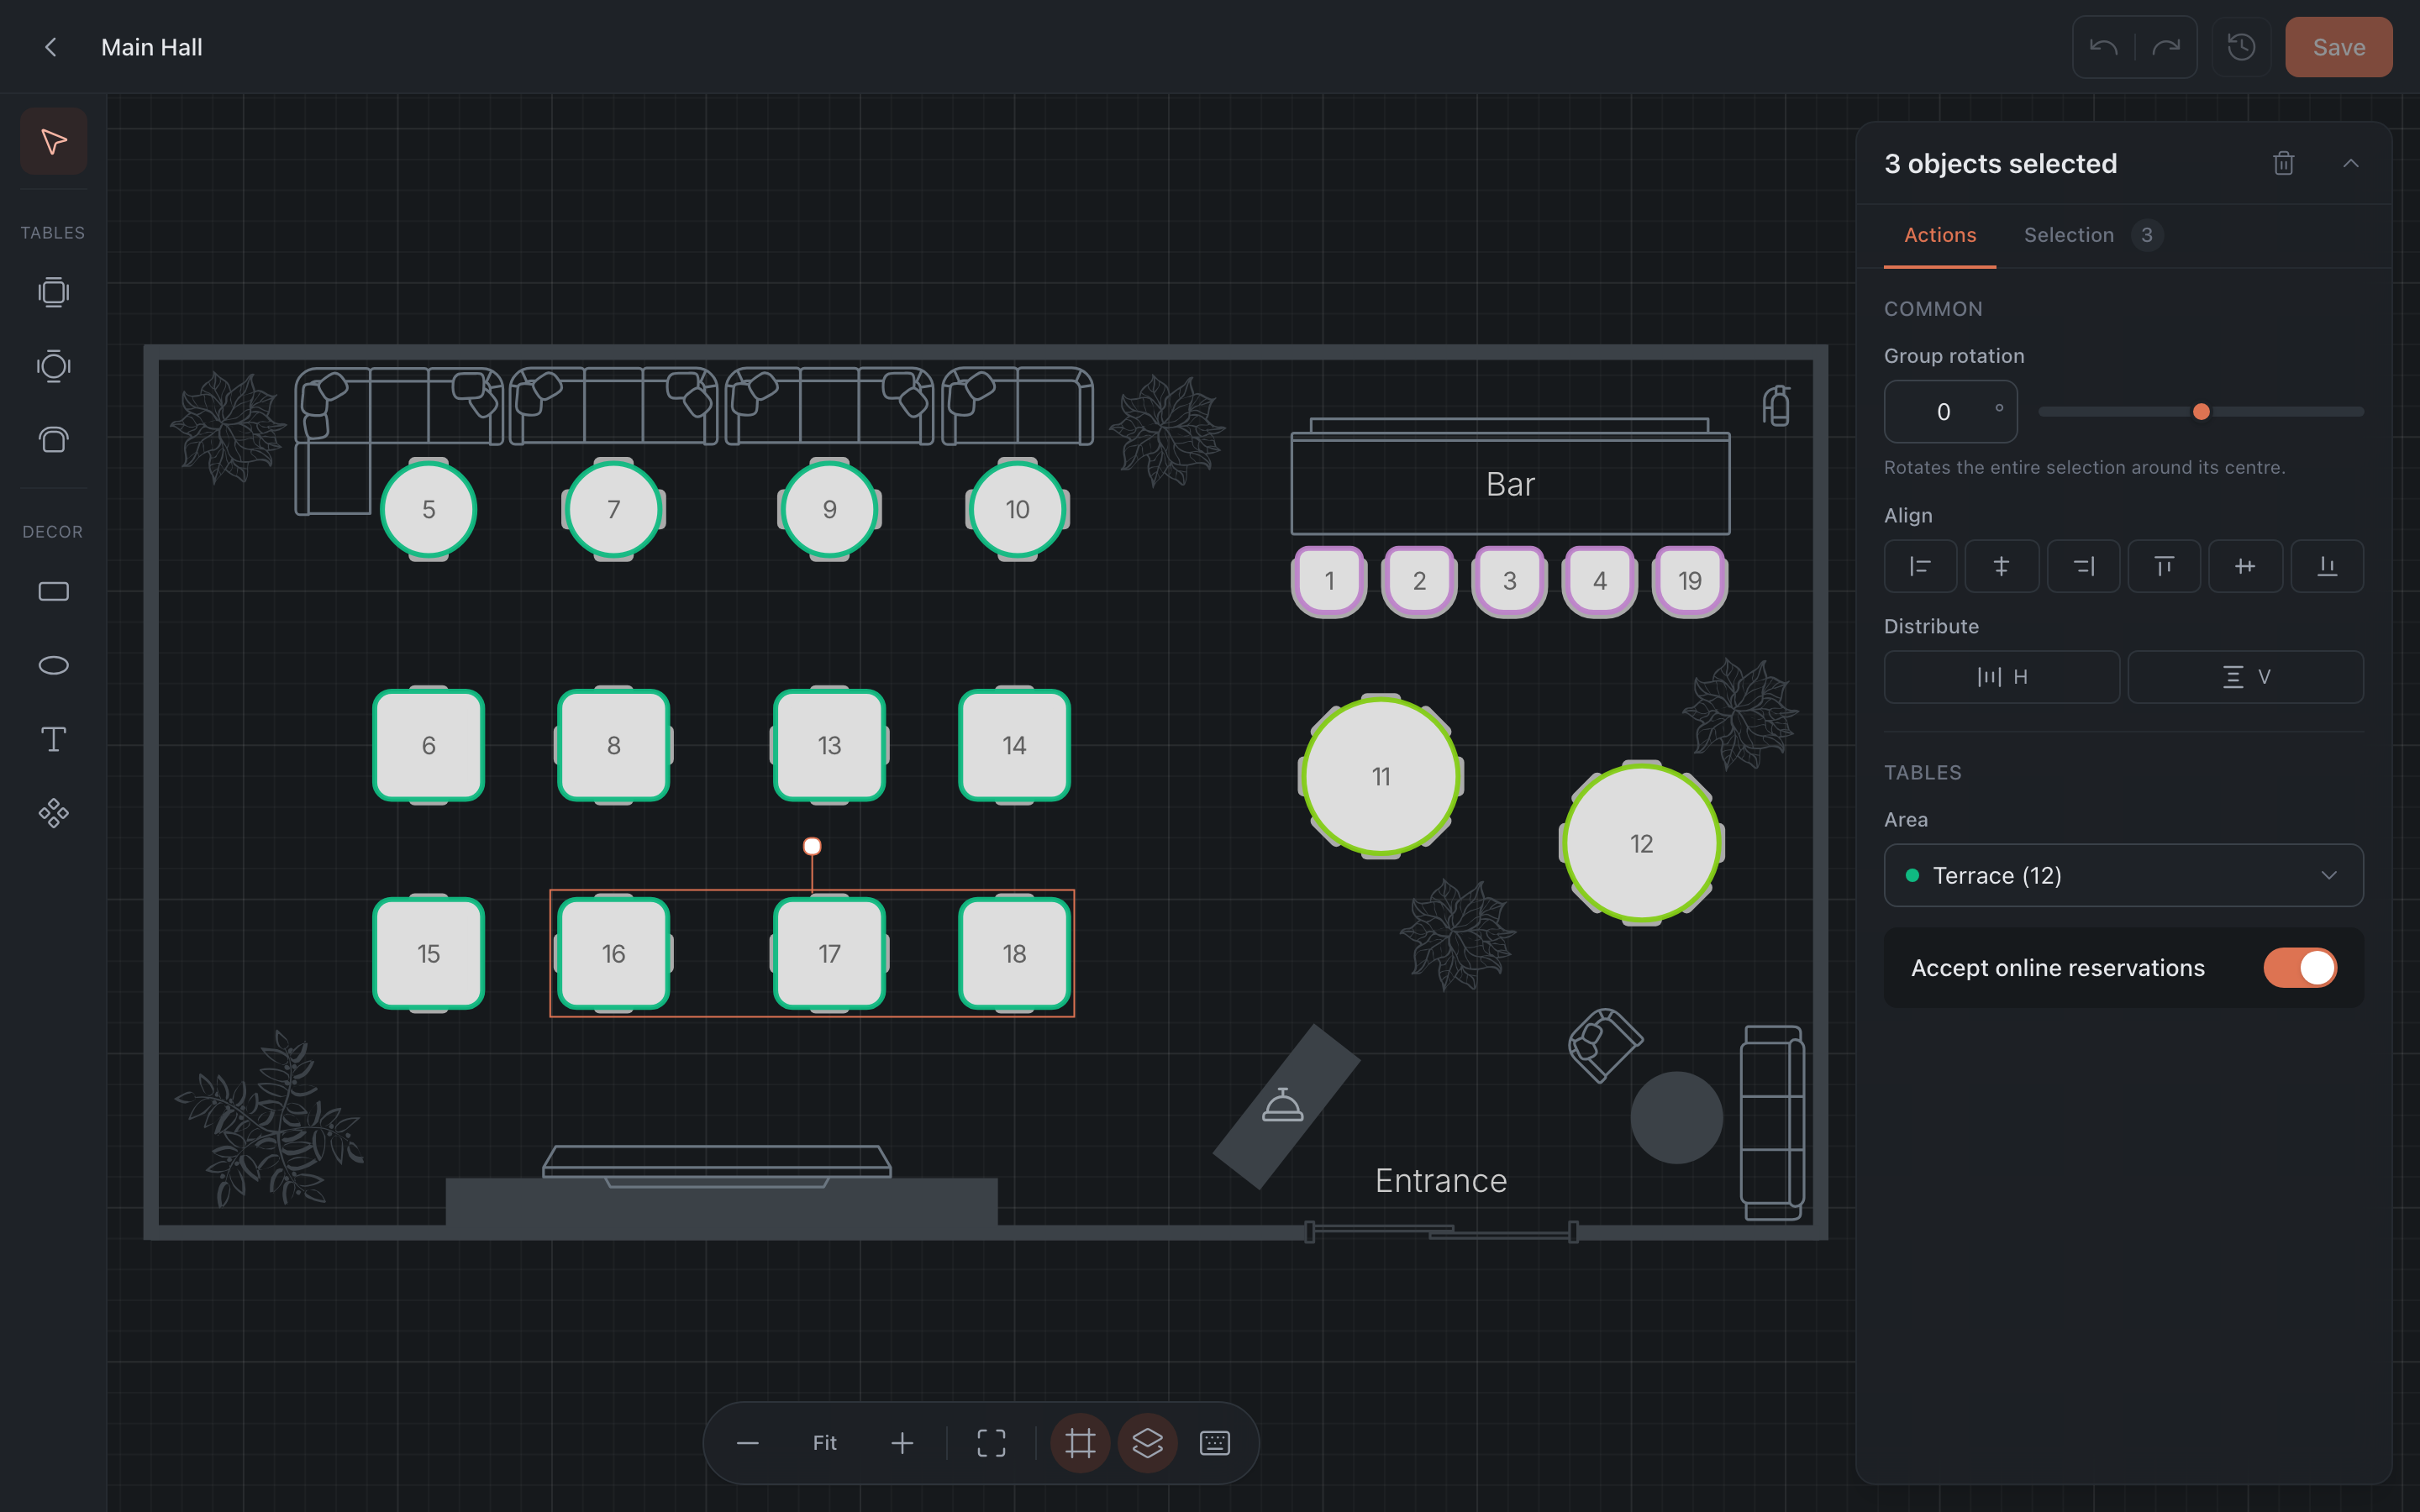
Drag a selection box, or add objects to the selection with Shift-click — the right-hand side then shows “N objects selected” instead of properties. This is how you move a whole row of tables, rotate the terrace block or delete extras in one go.
For a group the panel offers: group rotation around its centre, alignment to any of the six edges and distribution horizontally or vertically. If the selection is tables only, you can also set a common area and toggle online bookings for all of them at once.
What you can show on the canvas
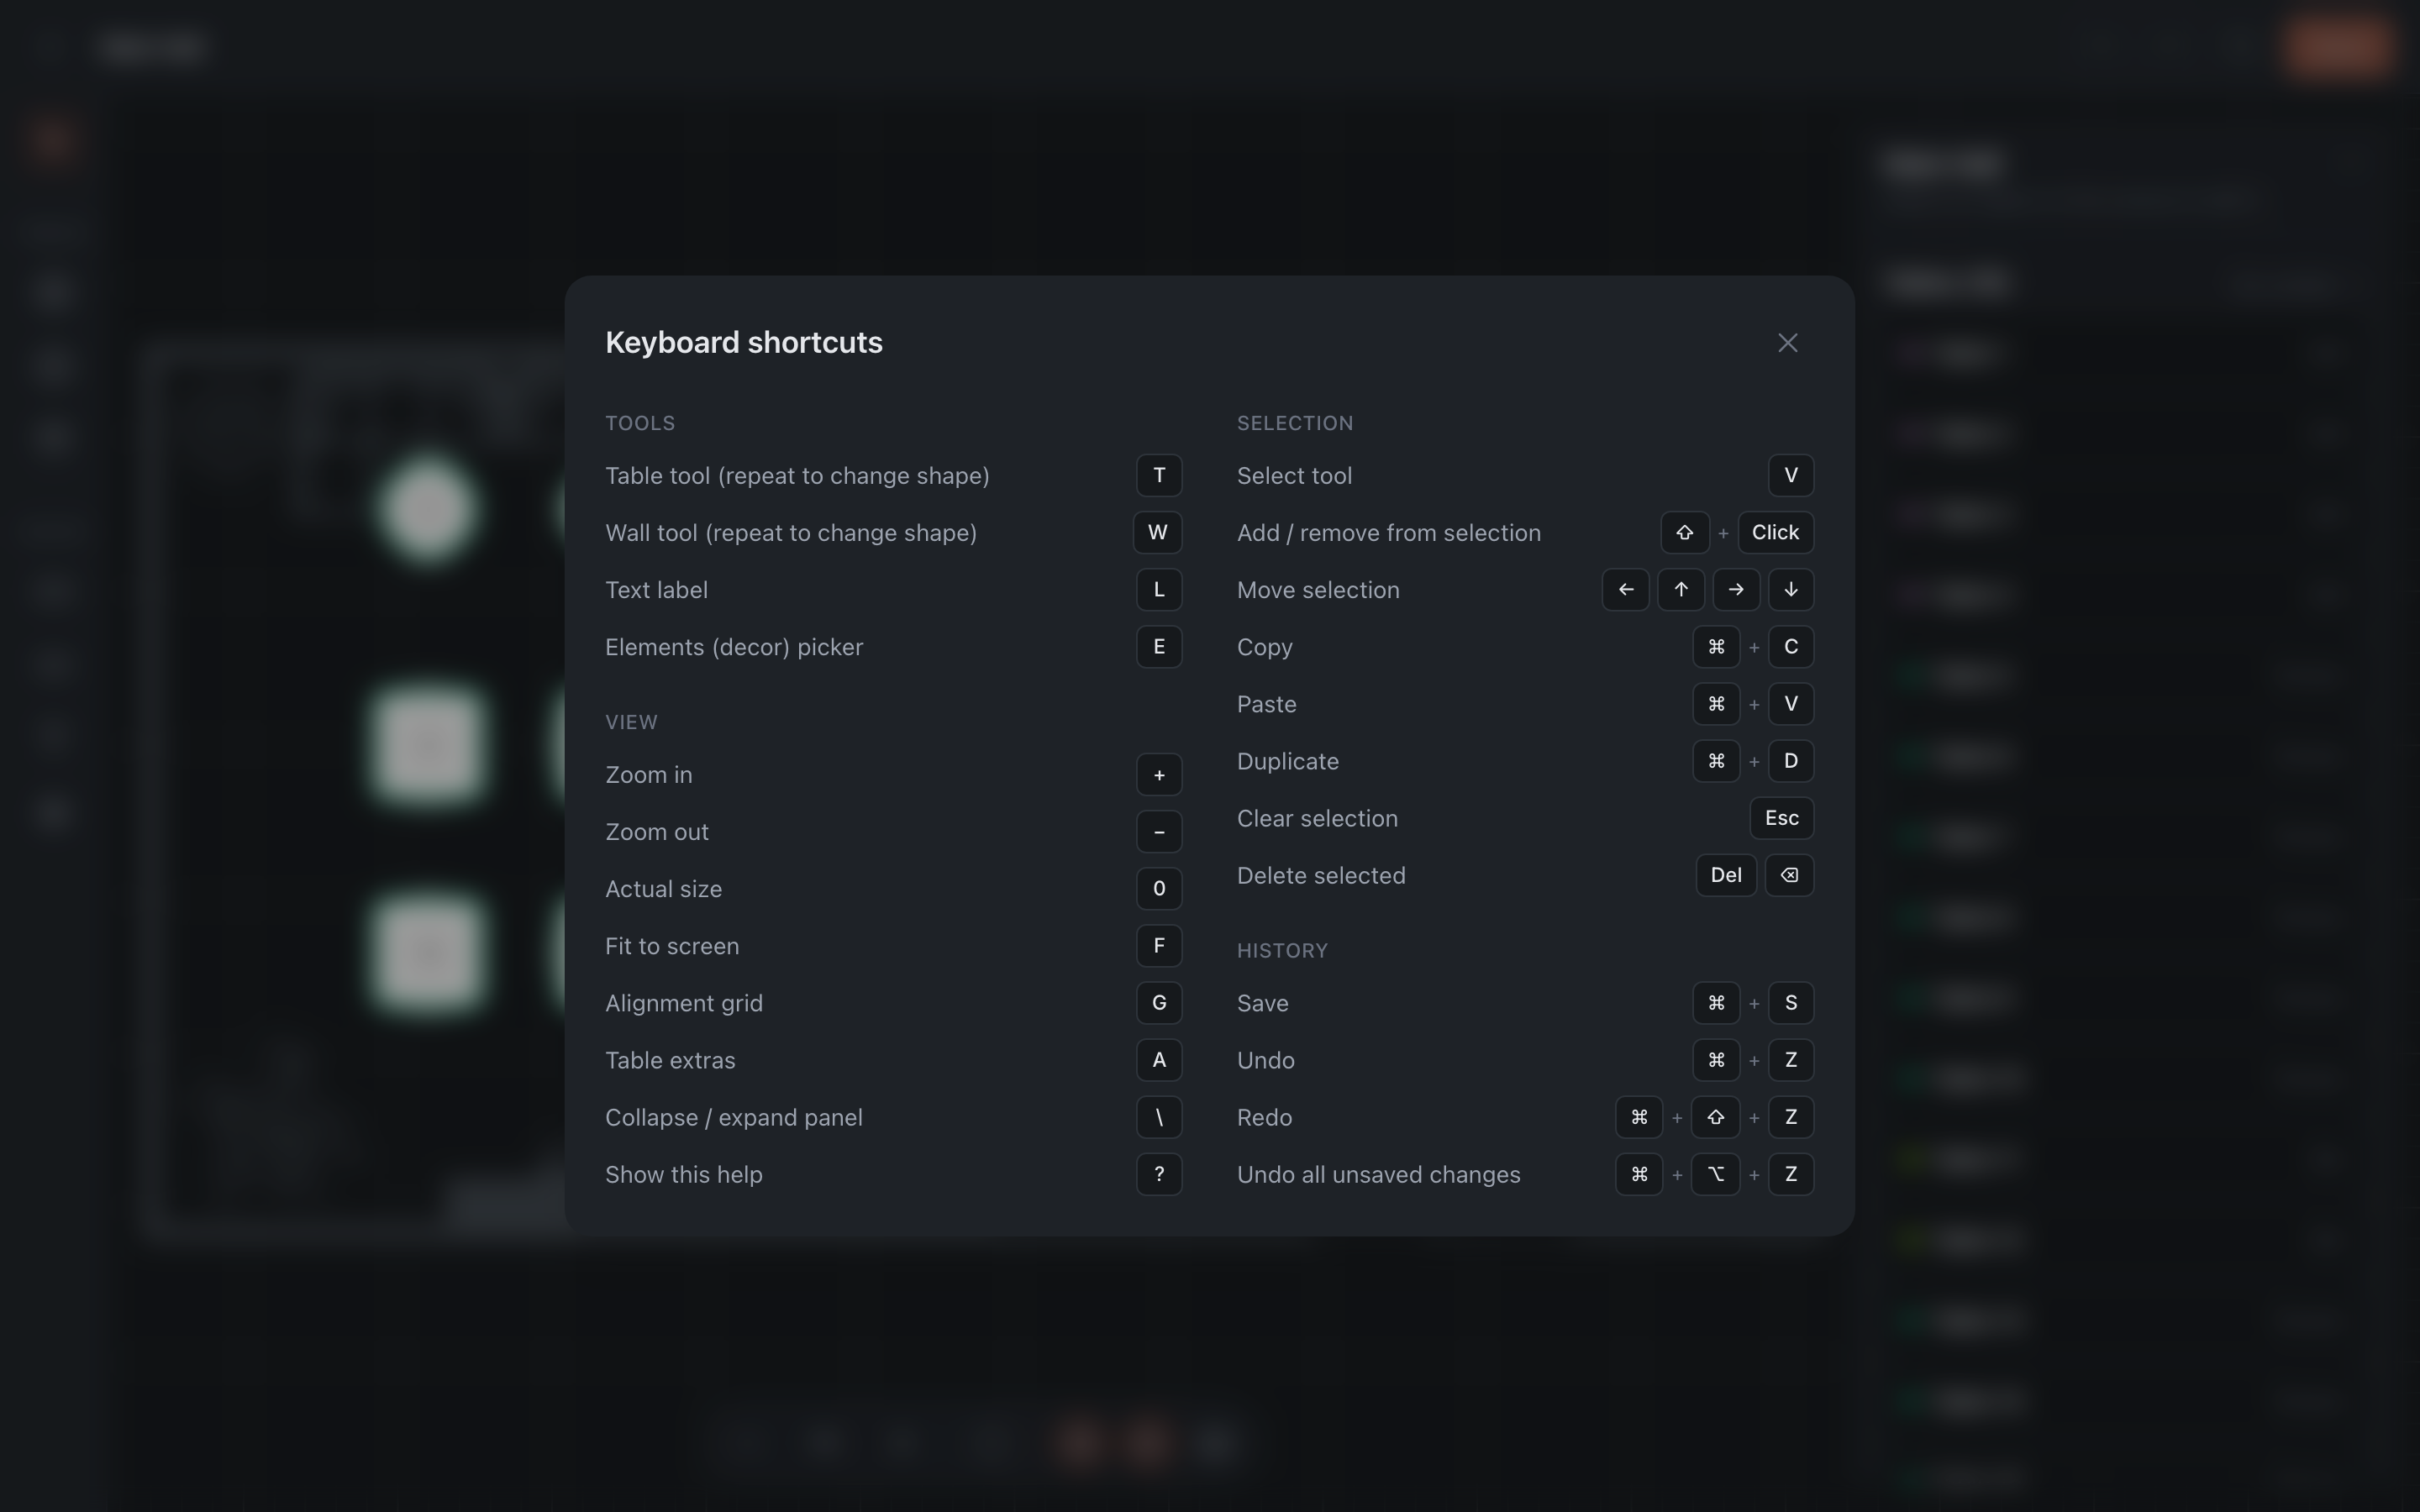
- Grid — the button or the G key; helps line objects up.
- Area and deposit indicators — the A key. Tables are coloured by area, and tables with a deposit get a marker. A quick way to check that areas are assigned correctly and the deposit sits where you meant it to.
- Zoom — ”−”, ”+”, “Actual size” (the 0 key) and Fit (the F key) to bring the whole plan into view.
The full list of shortcuts is behind the ”?” button on the zoom controls.
From a phone
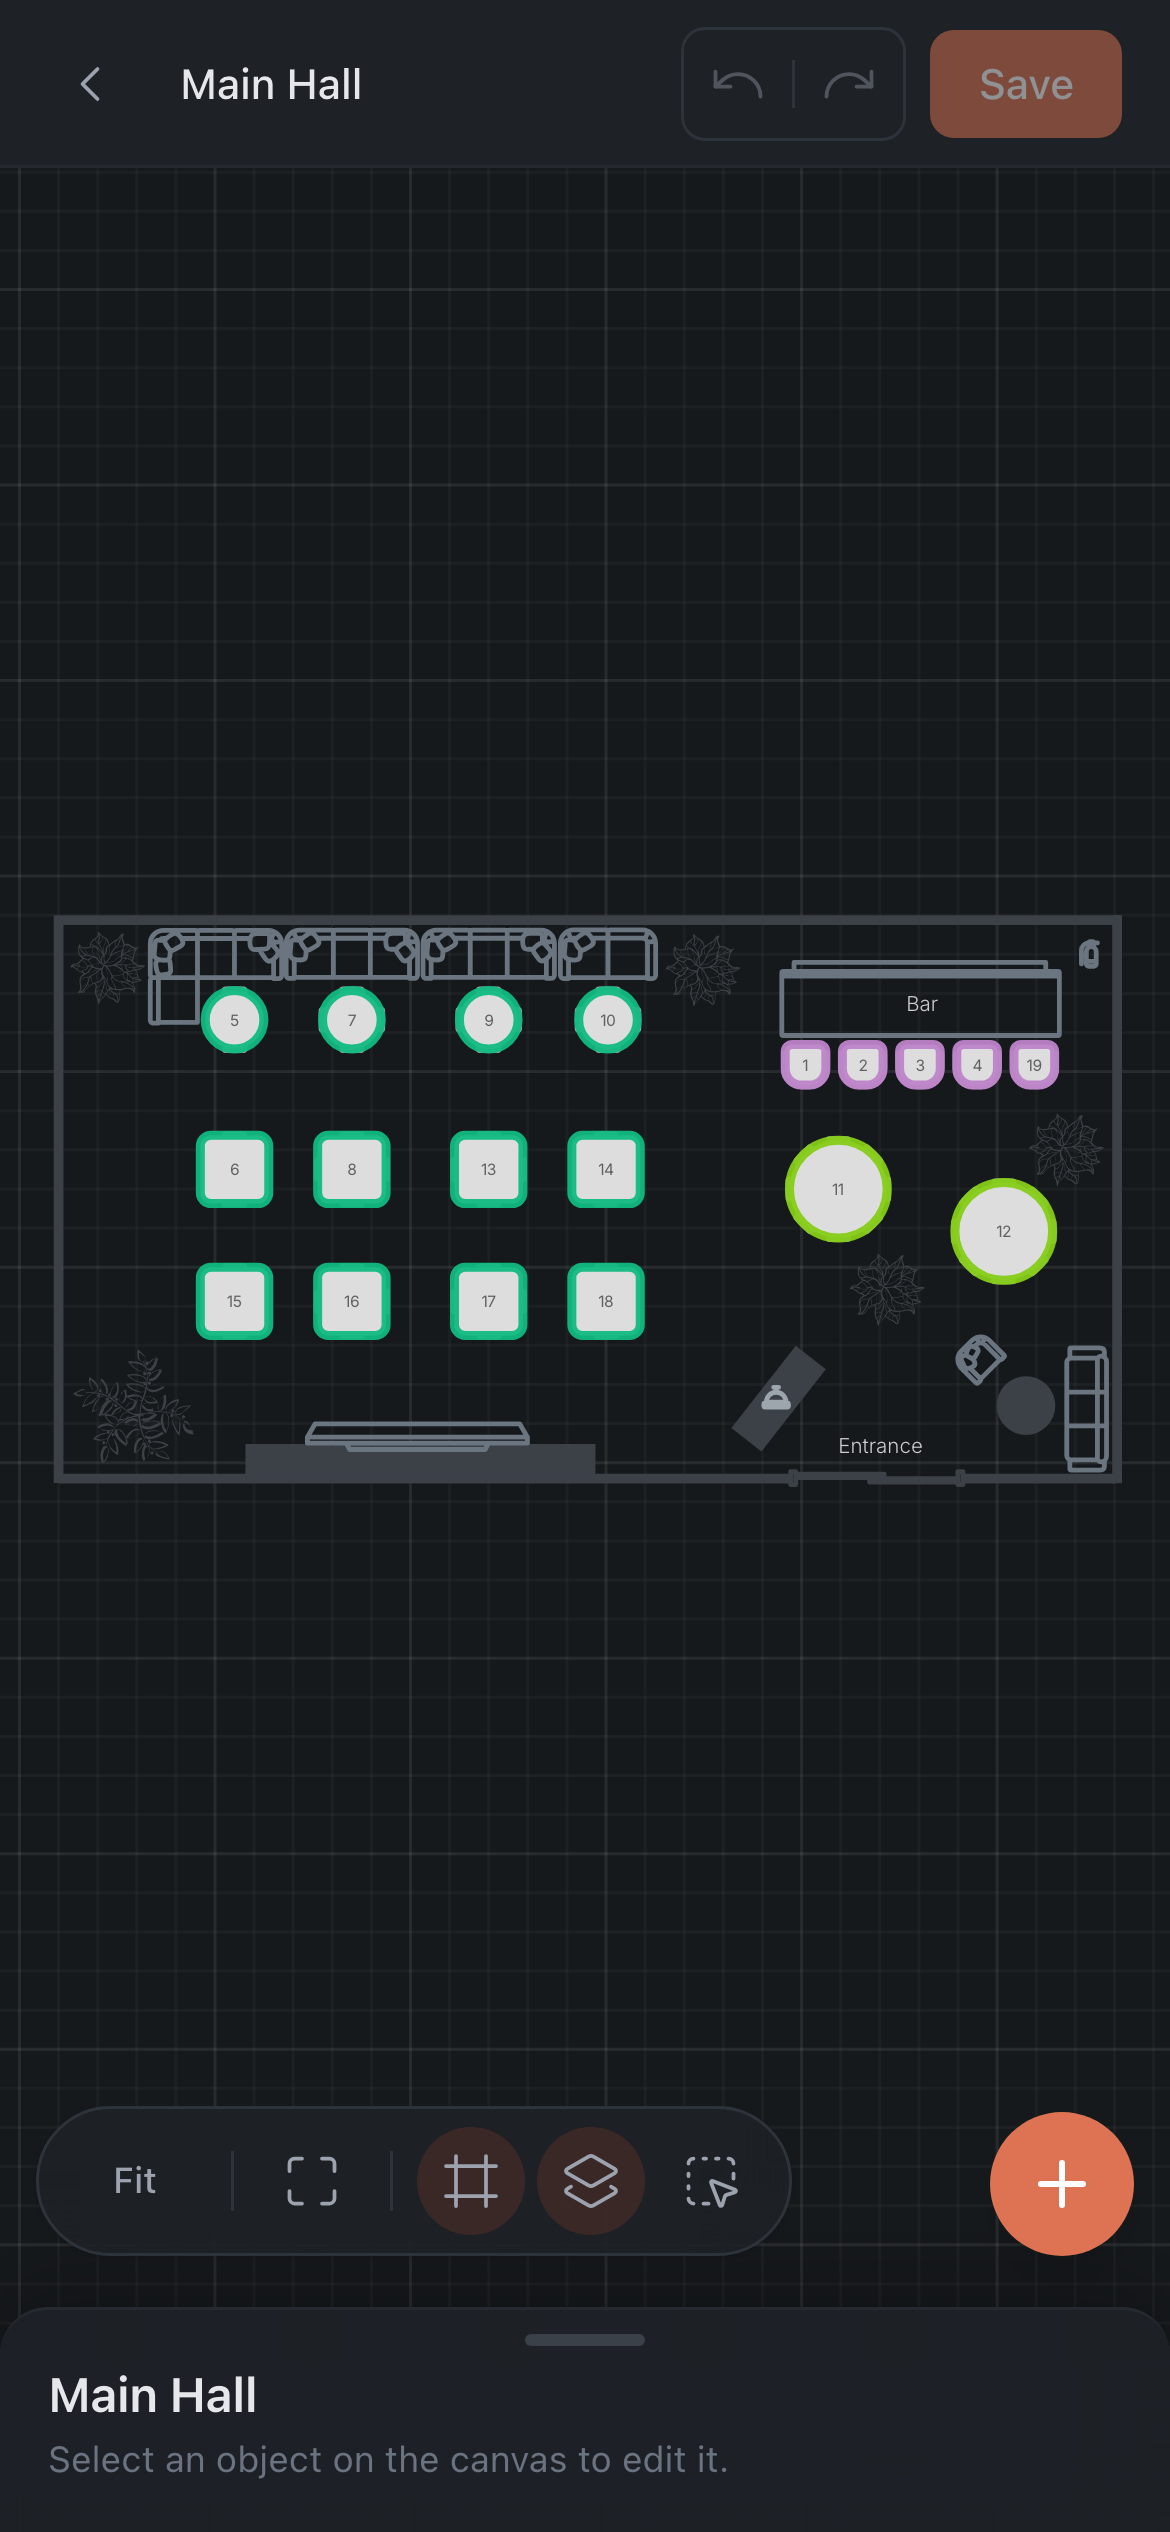
The builder works on a phone too: objects are added with the “Add object” button, then a tap on the canvas puts one where you want it. Multi-select has its own button; with it on, a tap adds an object to the selection.
What’s next
- Floor Plans — the list of plans and areas, enabling and deleting.
- Table Rules — combinations, duration and server rotation.