How to create a floor plan
Build your floor layout from scratch — areas, tables and their capacity in the floor plan editor.
A floor plan is needed so the system knows your tables, their capacity and position — then it can seat guests and show the floor map.
What to do
-
Open Floor & Tables → Floor Plans and click Add Floor Plan (e.g. “Main Dining Room”).
-
In the Seating Areas section create at least one area (Patio, Dining Room, Bar…) — tables are bound to areas.
-
Open the plan by clicking its card — the editor launches.
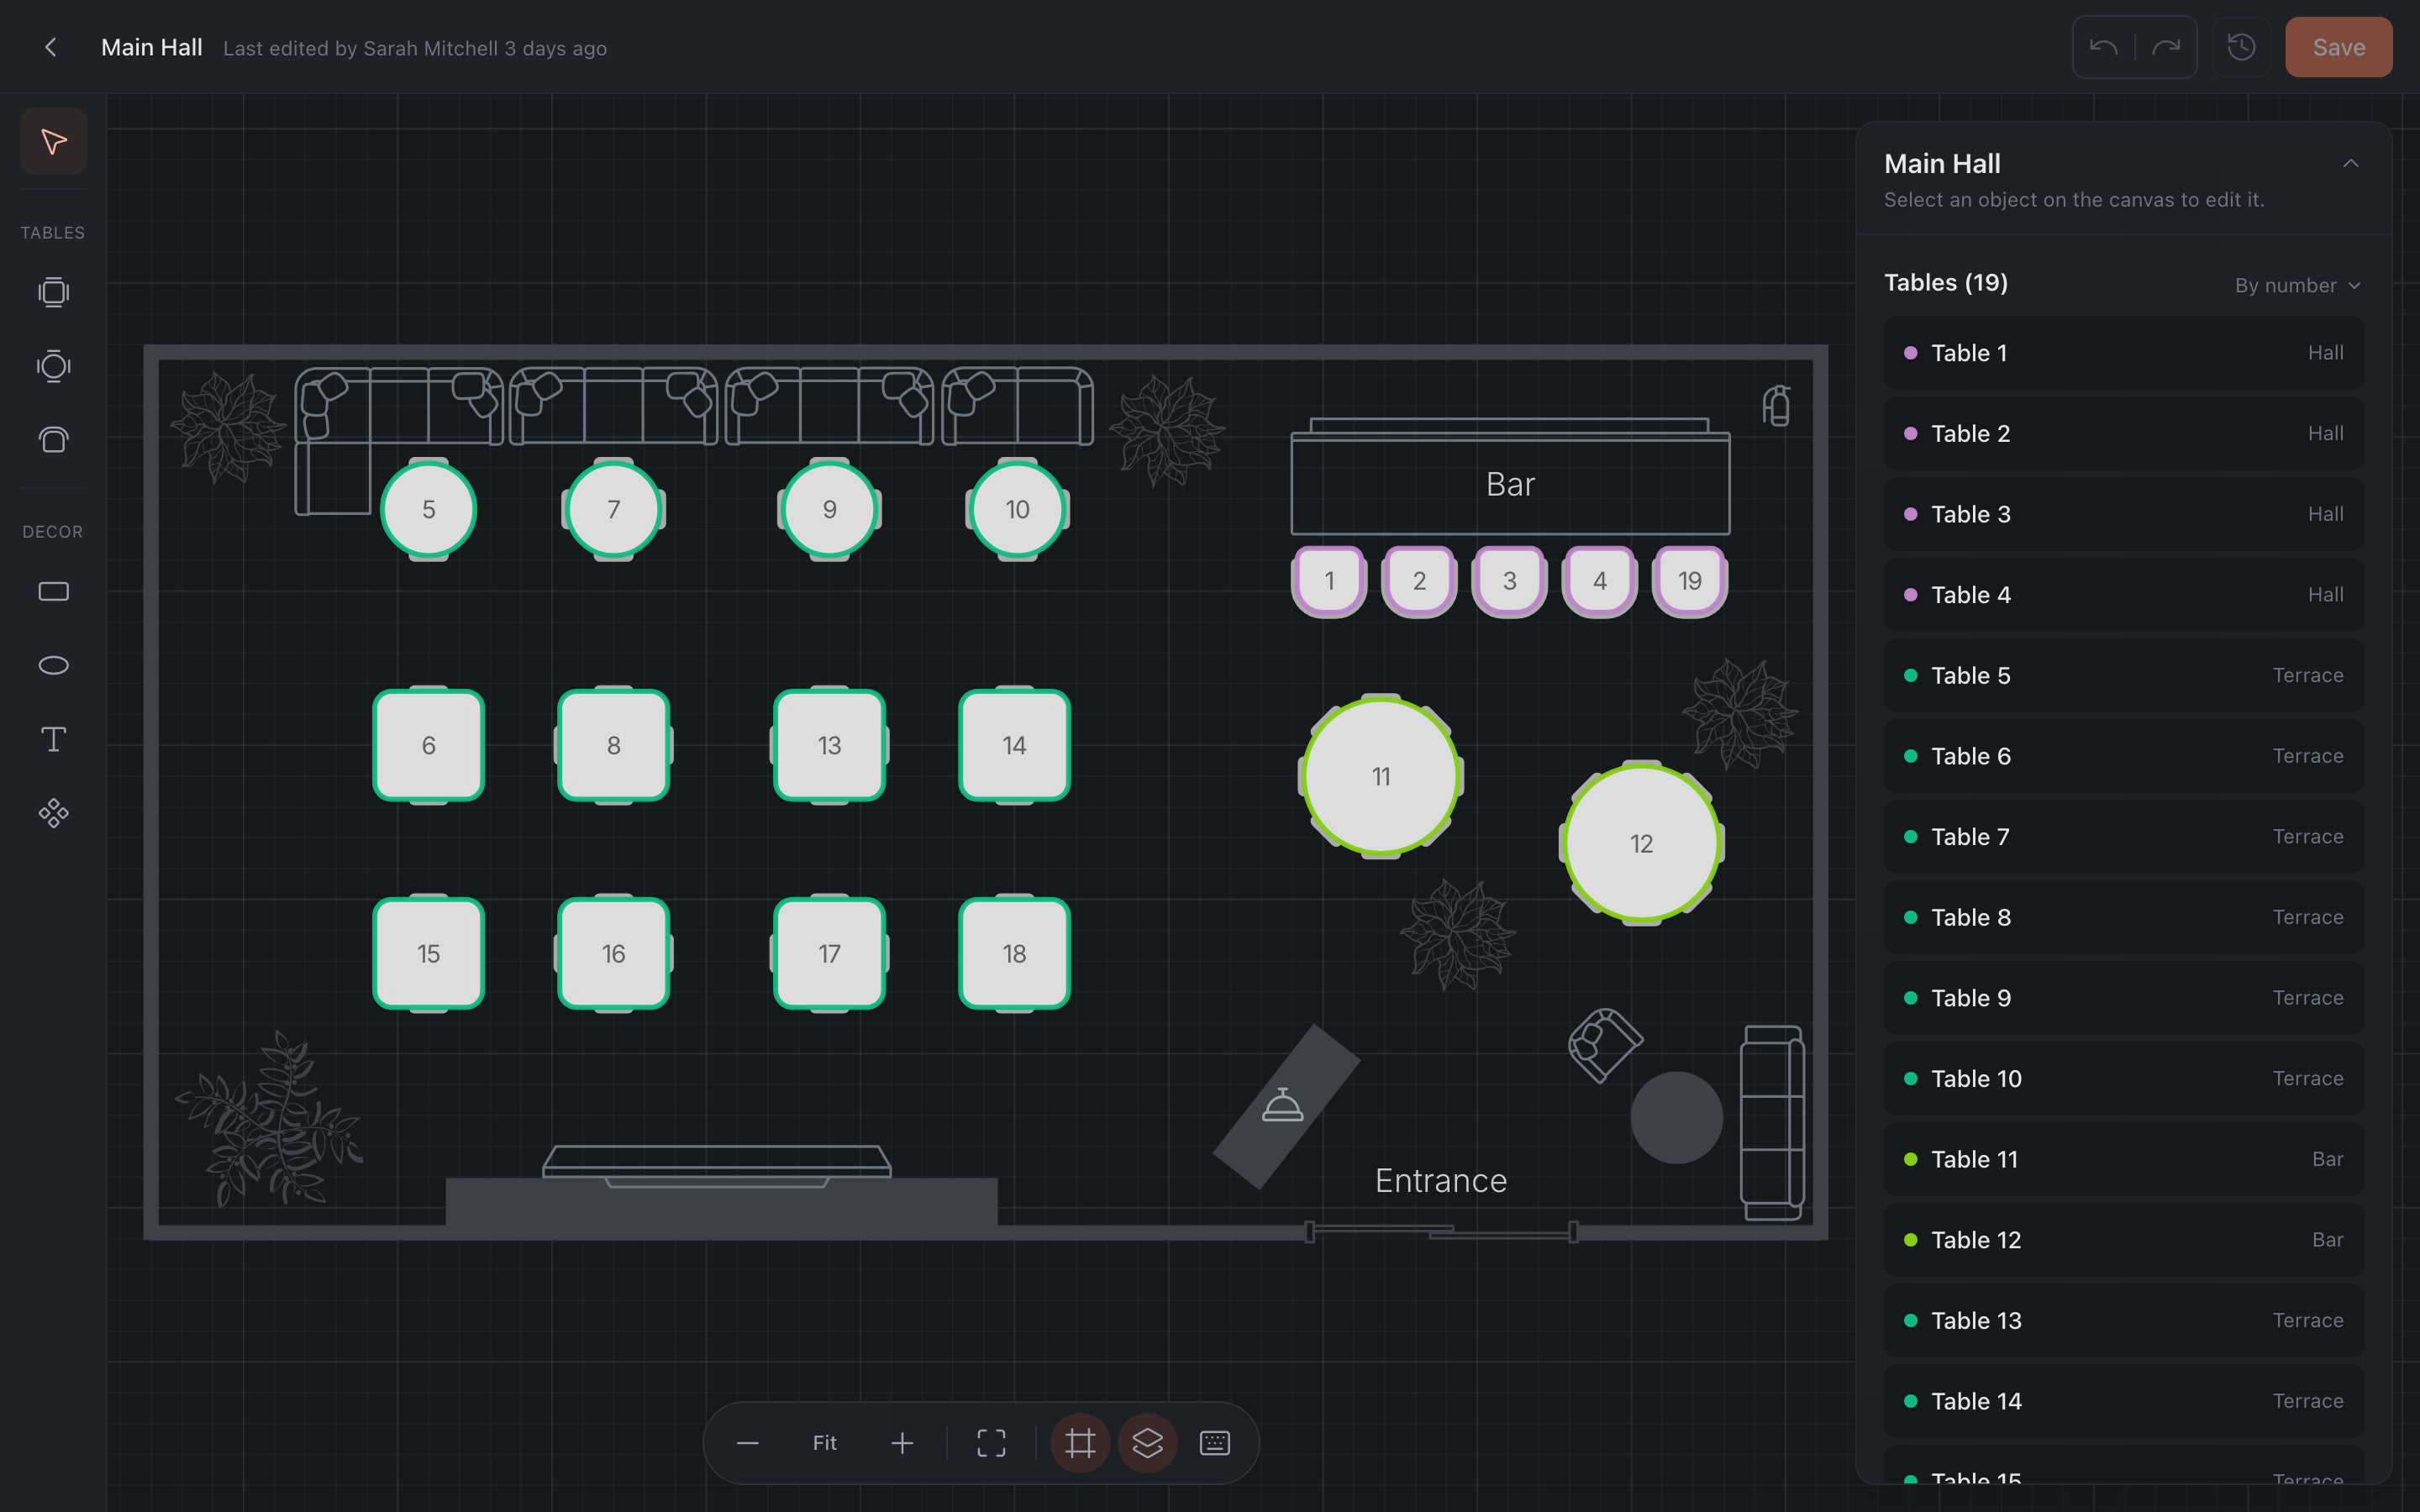
-
An empty plan offers three ways to start — pick whichever suits you:
- “Add your first table” — place tables by hand, from scratch. The most precise route if your room is unusual.
- “Load a sample plan” — a ready-made layout you can reshape: faster than starting from a blank canvas.
- “Create from a photo” (Alpha) — upload a photo or a drawing of the room and the panel recognizes the tables for you. You then review the result and tidy it up: recognition isn’t perfect yet.
The same card offers “Take a quick tour” — a short walk-through of the tools inside the editor.
Every tool, decor item, group operation and keyboard shortcut is covered on the Floor Builder page.
-
On the left pick a table tool (rectangular / round / bar / single-seat) and click the canvas to place a table. While the restaurant has no areas at all, the table tools are inactive — an area can be added right in the editor’s right panel.
-
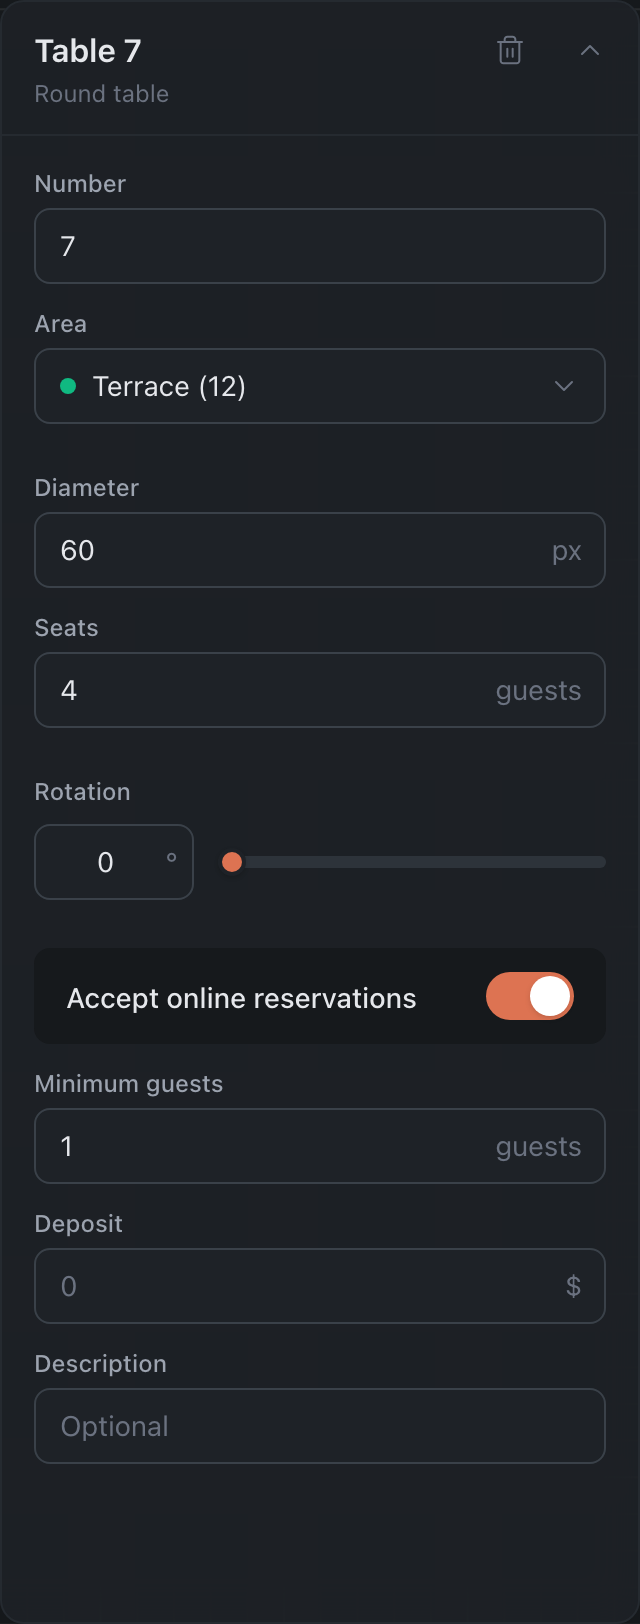
Select a table and set its properties on the right: Number, Area, Seats (capacity), and if needed Minimum guests and Deposit.
The “Minimum guests” and “Deposit” fields live in the “Accept online reservations” block and are available only when that toggle is on.
The exception is the “Bar / single-seat” type: it has a fixed size and exactly one seat, so the size fields, “Seats” and “Minimum guests” are absent from its properties.
-
Place the remaining tables and click Save at the top right.
- Go back to “Floor Plans” and enable the plan with the toggle.
Result: the floor is built, tables with capacity are ready for seating and online bookings.
Related: Floor Builder · Table capacity · Combine tables · Block a table