How to brand your guest emails
Style confirmation emails in your brand — colors, logo and promo.
Confirmation and reminder emails can be styled to match your brand, so the guest sees the restaurant’s identity rather than the default template.
What to do
-
Open Messaging → “Branding” tab.
-
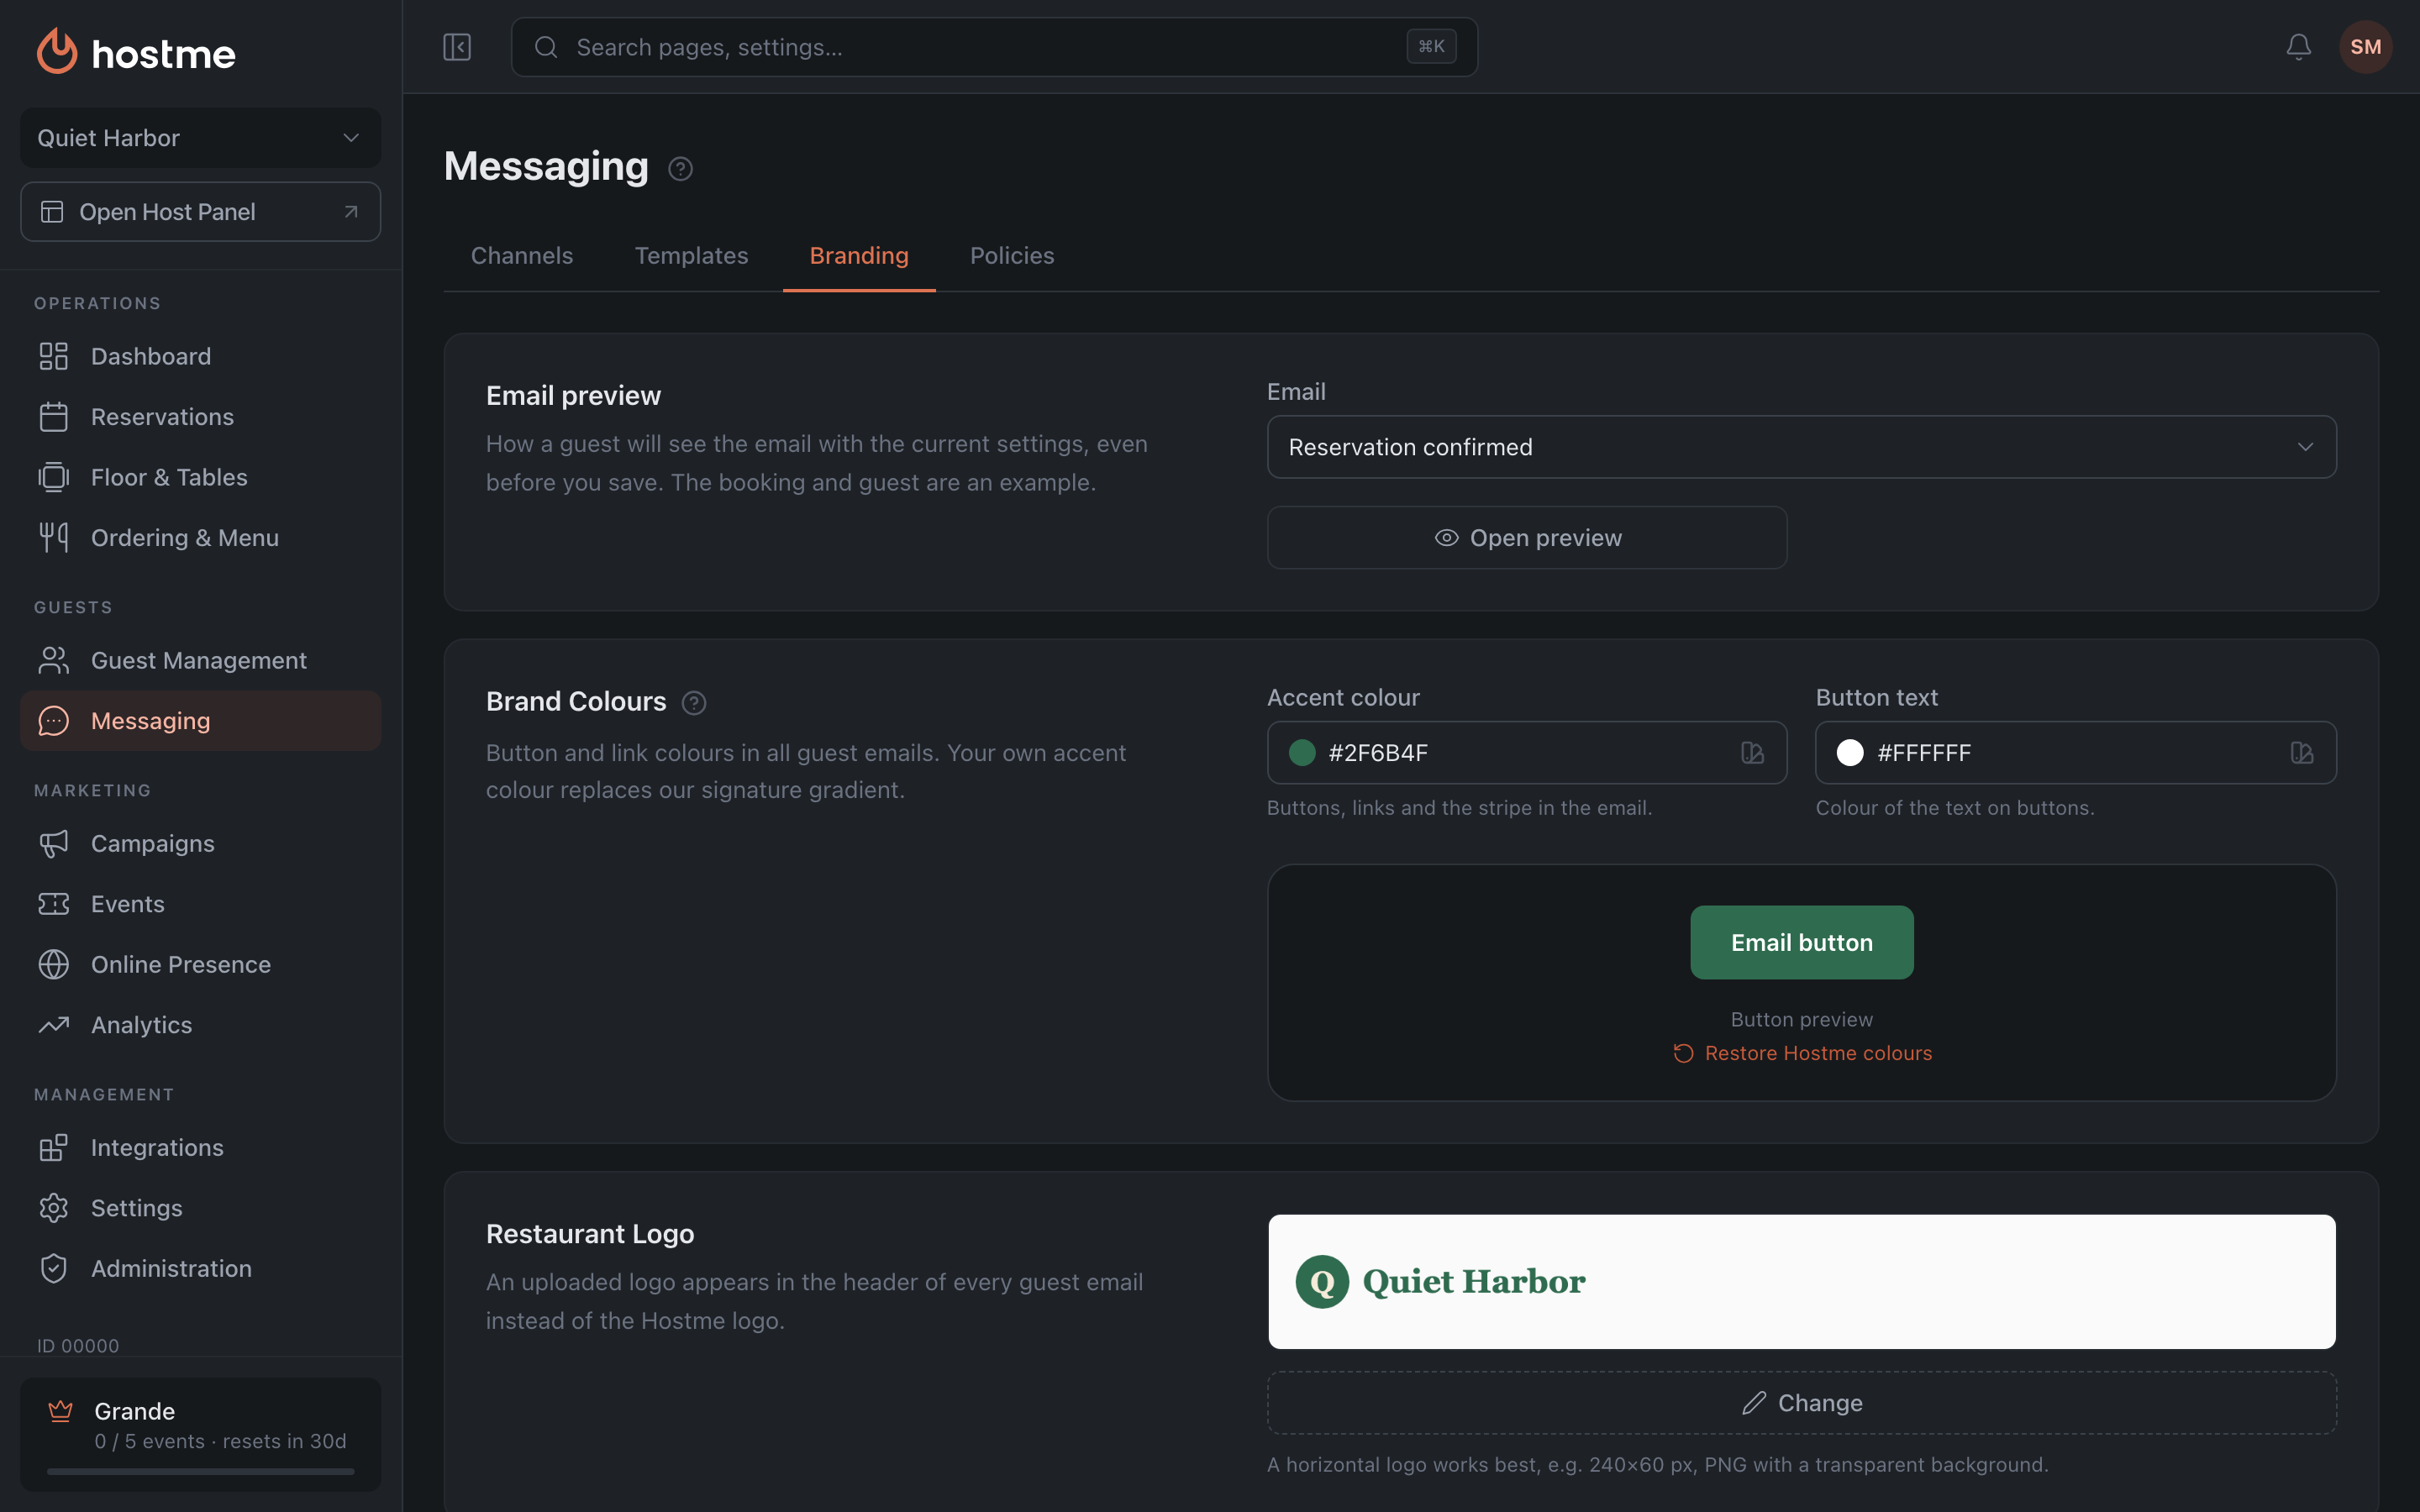
At the top of the tab there is the email preview: how the guest will see the email with the current settings, even before you save. You can switch between emails: reservation, waitlist, order.
-
Set:
- Brand Colors — the accent color (buttons, links and the stripe in the email) and button text. The “Restore Hostme colors” button brings back the standard colors.
- Restaurant logo — goes into the email header instead of the Hostme logo. A horizontal logo works best, for example 240×60 px, PNG with a transparent background. You can upload the image, pick it from the gallery or paste a link.
- Promotional Section — a promo image, title and text (for example, a special offer). The text is written in the restaurant’s language.
To remove the logo or the promo image, click the cross in the corner of its preview.
-
Further down the same tab:
- “Details in the email” — what the guest sees: table number, deposit, guest requests, the view/modify reservation button, policies and more. Each email type has its own set (Reservation, Waitlist, Order).
- “Email design” — restaurant copyright, promo and restaurant social links. For the promo to appear in the email, switch on “Promo”.
-
A bar with the “Save Changes” button appears at the bottom — click it. While there are no edits, the bar isn’t visible.
-
(Optional) In the “Policies” tab — the policy texts.
Result: guests receive emails in the restaurant’s brand style.
Related: The Messaging section